
“RECIPES ARE AMAZING THINGS, SOMEWHERE BETWEEN MAGIC POTIONS AND PASSPORTS TO A DIFFERENT WAY OF LIVING.” /BEE WILSON, THE GUARDIAN 18 JUNE 2017
recipes from the mission
recipe list:
(listed from bottom to top, please scroll all the way down)

5 Mexican Beverages to Meet You Warm
Atole: History & Chocolate Atole (Champurrado)
Mexican Holiday Punch “Ponche Navideño”
Rosca de Reyes: Bake a "3 Kings' Cake"
Alegrias: Happy Amaranth Cakes
Albondigas: Mexican Meatballs
BLACK “BAKED” FRIJOLE DE OLLA (MEXICAN CLAY POT BEANS)
ELOTE (MEXICAN CORN ON THE COB)
TEQUILA-INFUSED JICAMA & WATERMELON GUACAMOLE
pomp & whimsy poached pears
ARUGULA SALAD W/ POMP & WHIMSY-INFUSED BRULEÉ GRAPEFRUIT
FROG HOLLOW FARM ROASTED CHERRY MOLE
FROG HOLLOW FARM PEACH SORBET W/ PINK PEPPERCORNS & THYME
URFA BIBER MOLE
SALSA MACHA
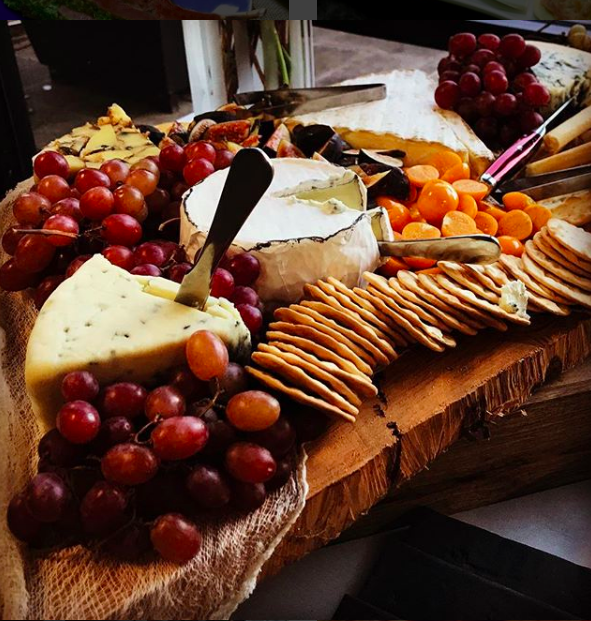
FALL
Roasted Veggies with Salsa Macha
About Salsa Macha
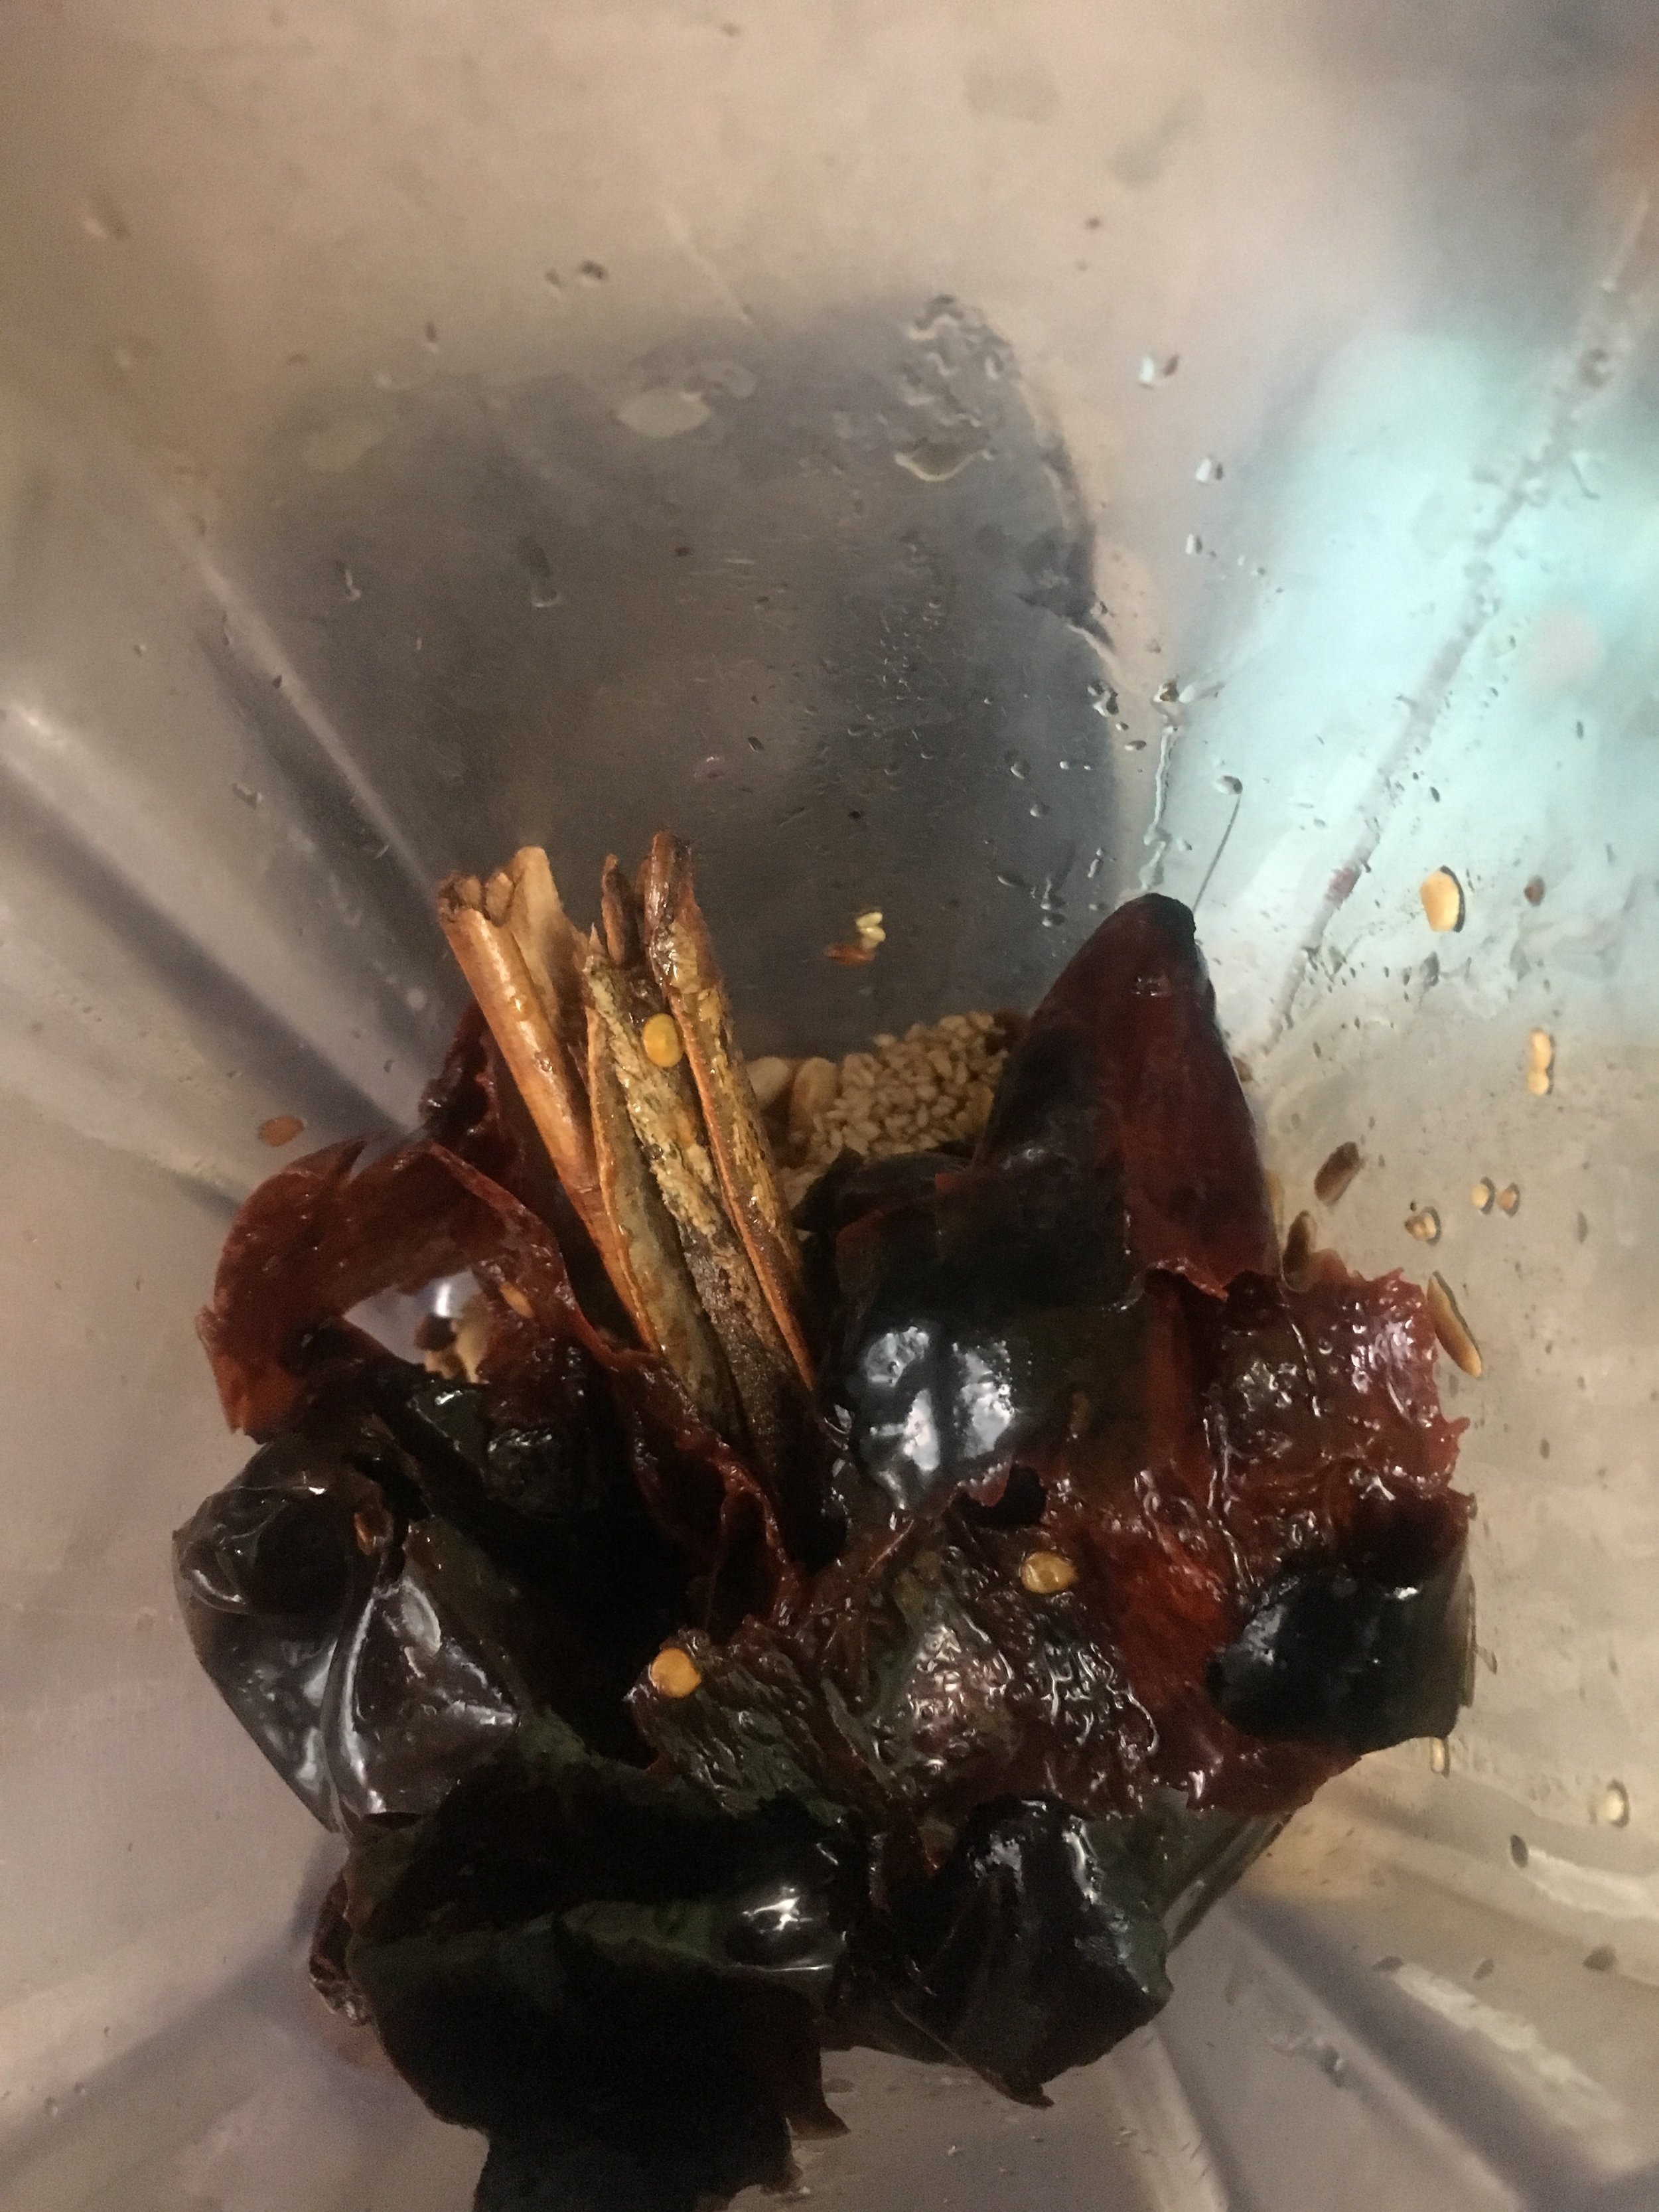
I don’t know about you, but I find that I almost always have small quantities of different kinds of nuts in my pantry, most leftover from topping salads, or even from snacking. And, like any good Mexican chef, I have a huge jar of assorted dried chiles. These, and garlic and good olive oil are all you need to make Salsa Macha, which has the power to turn any vegetable into a stellar plate. The trick is to use an array of nuts and an array of chiles. Each brings it’s own, unique flavor to the salsa. Make note of the quantities and combinations of nuts and chiles you use. When you make your favorite batch, you’ll be ready to repeat it the next time.
Salsa Macha works especially well with vegetables that have layers, like fennel or Brussels sprouts, that you can cut in half and place on a roasting pan with the layered side facing upwards; this way, when you drizzle or brush your veggies with the salsa it penetrates the layers for really great flavor. For an unexpected side with steak, half a Spanish white onion and brush with a thick layer of Salsa Macha, roast in a slow oven (300°) for 30-40 minutes, then drizzle with more Salsa Macha before serving. This salsa also pairs beautifully with chicken: simply brush skin before roasting, and if roasting whole bird, rub inside cavity with it as well.
Salsa Macha is originally from the state of Veracruz on the Gulf of Mexico, a port city where spices and ingredients not indigenous to Mexico entered with the ships that docked there. Much of the cuisine coming out of Veracruz is atypical to that of the rest of the country, in that there is a strong Caribbean and Afro-Caribbean component to the ingredients and flavors. This, combined with indigenous Mexican and, of course, Spanish cooking comes together to inform Veracruzano cuisine.

Choose your root veggies as much for their colors as their flavors: rainbow carrots, red and golden beets, Brussel sprouts (don't over cook, should still be bright green), parsnip. Use your favorite pie crust/dough recipe, pre-bake in a tart pan, removing the crust from the oven when it is just a little under-cooked. Cook veggies first, separately, each according to the time required. Beets require the most time, carrots a little less, then parsnip, and Brussels sprouts only need a few minutes. Boil the first three of these (peel carrots and parsnip first, peel beets after cooking). Veggies are done when they can be pierced easily with a fork. For your Brussels sprouts, remove a thin slice from bottom (this part usually looks a dry and even a bit dirty), cut in half or even in quarters for larger spouts, steam them just until they are al dente. Cut root veggies so they are approximately the same size as your cut Brussels sprouts, then toss all veggies in a pan with hot olive and crushed garlic, season with salt and pepper to taste; cook just until the Brussels sprouts begin to caramelize. Add veggies to crust and bake for about 5-8 minutes at 350°, until crust is finished and has a light golden color. Serve with Salsa Macha.
Salsa Macha
(makes 2 about cups)
4-6 dried chiles (any combination of chiles will work: Anchos, Guajillos, Puyas, Chipotle Moritos or Mecos are especially good due to their smoky flavor; if using smaller and much hotter Chiles de Arbol, you will want to adjust the total # of chiles accordingly
4 cloves garlic
1/3-1/2 cups assorted nuts (peanuts, pecans, almonds are all good. If using walnuts, blanch first to remove bitter skin. If using hazelnuts, roll them in a dish towel to remove skins)
2 tablespoons raw white sesame seeds
2 tablespoons cider vinegar
½ Star anise (optional)
1 tablespoon oregano (preferably Mexican, available through Rancho Gordo)
2 tablespoons piloncillo (or substitute brown sugar)
Salt to taste (adjust salt if any of the nuts you are using are salted)
Dry roast garlic on the comal, until it begins to blacken, turning so as to expose all sides of the garlic to the heat. Dry roast chiles until they puff up and/or begin to change color and just start to blacken. You will need to watch your chiles carefully so as not to burn them; every chile cooks differently—some, like Chiles de Arbol, cook very quickly; others, like the wrinkly Ancho chile, need a little encouragement. Weigh Ancho chiles down by placing a small pot of water on top of them (or, even better if you have a bacon press, use that) so that the surface of the chiles are touching the comal. Dry roast sesame seeds until they begin to “dance”; after this happens you will need to immediately remove them from the comal as they burn very easily. Remove stems and break or tear larger chiles into small pieces. You may include the seeds for a hotter salsa, or remove them, to your taste (the seeds and veins are the hottest parts of a chile). Now, put all the dry-roasted ingredients including the star anise (if using) into a strong blender with the remaining ingredients and mix until well blended but not pulverized. You are not going for a purée, but rather a sauce that has the texture of a pesto but with more olive oil than pesto. Let the mixture sit at least overnight before using, so as to infuse the olive oil with the flavors of the rest of the ingredients.Store in airtight jar in the refrigerator.
Note:I prefer dry roasting because it adds a smoky flavor to the salsa, but some chefs prefer to sautée the garlic and dry ingredients in the olive oil before blending. If you choose this method, be sure to allow the olive oil mixture to cool well before blending.
urfa biber mole

Urfa Biber Mole pairs well with any kind of poultry, pork or beef. I paired it here with Pulled Chicken on a Blue Corn Tortilla with Sweet Plantain Purée and topped with Queso Fresco.
While a mole made with a chile native to Turkey may sound unusual (it is!), in a strange way, it makes complete sense:
The preeminent food historian Rachel Laudan posits that “both moles and curries [are] vestiges of the cuisine of medieval Islam, a cuisine that was enjoyed from southern Spain in the west to northern India in the east. The high cuisine of medieval Islam [was] one of the most sophisticated the world had seen…. With the diffusion of Islam, the cuisine was transplanted to new territories. One of the most important was the Iberian Peninsula, whose southern two-thirds came under Arab rule in the eighth century” [Laudan, 2004, The Mexican Kitchen’s Islamic Connection, Aramco World, Volume 55, Number 3]. From Spain, the culinary pathway to Mexico is a clear and direct one. While Mole Poblano is the best known, there are over 300 different moles in the state of Oaxaca, Mexico, alone!
Spiceology's Urfa Biber Chile is a sun-dried Turkish Pepper, which we found to be exactly as described on their website with "a dark roasted flavor reminiscent of raisins, chocolate, or coffee… has a mild heat that builds, and the direct sunlight creates a sensation of smokiness". In this mole, with its raisin, smoke, spice and a hint of chocolate, the flavor notes of the Urfa Biber Chile are front and center.
(Make 2 quarts, enough for 10-12 servings as a side to protein or 8-10 portions if served alone, with corn tortillas, of course! Prep time: active 2 hours. Cooking level: Intermediate to Expert)
Ingredients:
4 Chiles Ancho
2 Chile Pasilla (dried)
4 tablespoons Spiceology Urfa Biber Chile
4 tablespoons raw white sesame seeds
4 small cloves garlic, peeled
2 thick slice Spanish white onion
4 tomatoes
2 plums
1/4 cup vegetable or olive oil
6 tablespoons raisins
4 tablespoons slivered almonds
4 tablespoons raw or roasted pecans
4 tablespoons raw pumpkin seeds
2 sticks cinnamon, preferably Mexican
7-8 whole cloves
7-8 whole allspice (Pimentón)
4-5 cups chicken or corn stock, plus ¼ cup to “clean” your blender jar (preferably homemade)
2 tablespoons agave
4 tablespoons dark (at least 70% cacao) chocolate, I recommend Dandelion Chocolate’s Kokoa Kamili, Tanzania Chef's Chocolate)
2 tsp. salt or to taste
1 old corn tortilla as needed
Dry RoasT: Whole Chiles, Sesame Seeds & Urfa Biber Chile, Onion, Garlic, Tomatoes and Plum
Preheat comal (or, if unavailable, a heavy non-stick sauté pan) on high heat and dry roast (so no oil) the whole dry chile(s). I like to use a bacon press to make sure all parts of my dried chiles are in contact with the comal. Dried chiles cook very quickly (about 20 seconds per side), you want them to have spots where they have started to blacken, but you don’t want them burnt. Work with cooking thongs, watch chiles carefully, turning frequently.
Next, add chiles to a bowl of cold water to cover; soak for 15-20 minutes, then remove and stems and seeds and add chiles to the blender jar.
Add sesame seeds to the comal (always keep the fire under your comal on high). Cook for 20-30 seconds, being sure not to burn them. Them will begin to jump; at that point remove them to the blender jar. Dry roast onion, tomato, plum and whole garlic cloves on the comal until charred on both/all sides. Next, turn off the stove and quickly dry roast the Urfa Biber Chile on the hot comal for just 30 seconds. Immediately remove from comal to blender jar. Allow plum to cool and remove pit. Add all ingredients you have dry-roasted to the blender jar.
Sauté: Heat 1/4 cup of the oil or enough to cover the bottom of a heavy sauté pan on medium heat and sauté each of the following separately so as to strictly control cooking time.
Working with a slotted spoon, be sure to remove every nut or seed between steps so you don’t accumulate burnt pieces in your cooking oil:
Sauté raisins for 30-60 seconds, until they puff up and remove to blender jar.
Sauté the almonds, moving them around in the pan, until they start to brown, about 2 minutes.
Sauté the pecans, moving them around in the pan, until they start to brown, about 2 minutes.
Sauté the pumpkin seeds, moving them around in the pan, until they start to brown, about 2 minutes.
Sauté the cinnamon stick, turning over once, about 30 seconds.
Sauté cloves and allspice quickly, about 20 seconds and remove immediately to blender jar.
Remove chiles from water (they should be soft) and add to blender jar, along with 2 cups of chicken broth, agave and chocolate.
Blend: using the purée setting on your blender until you have a very smooth purée.
You may need to work in two batches. (No need to worry about dividing the ingredients evenly between the batches, as everything will end up together).
Adjust your mole for taste and texture:

Mix your two batches of mole, if needed, well in a large bowl. Your mole should be the texture of a thick spaghetti sauce. If it is too thick, add more stock. If it is too thin, toast a tortilla on the comal or directly over a flame until edges begin to brown. Add half the tortilla to mole and blend again. Add the other half if needed until you achieve the texture you are looking for (mole will not thicken as it cooks). Strain your mole through a fine sieve.
Cook off your mole:
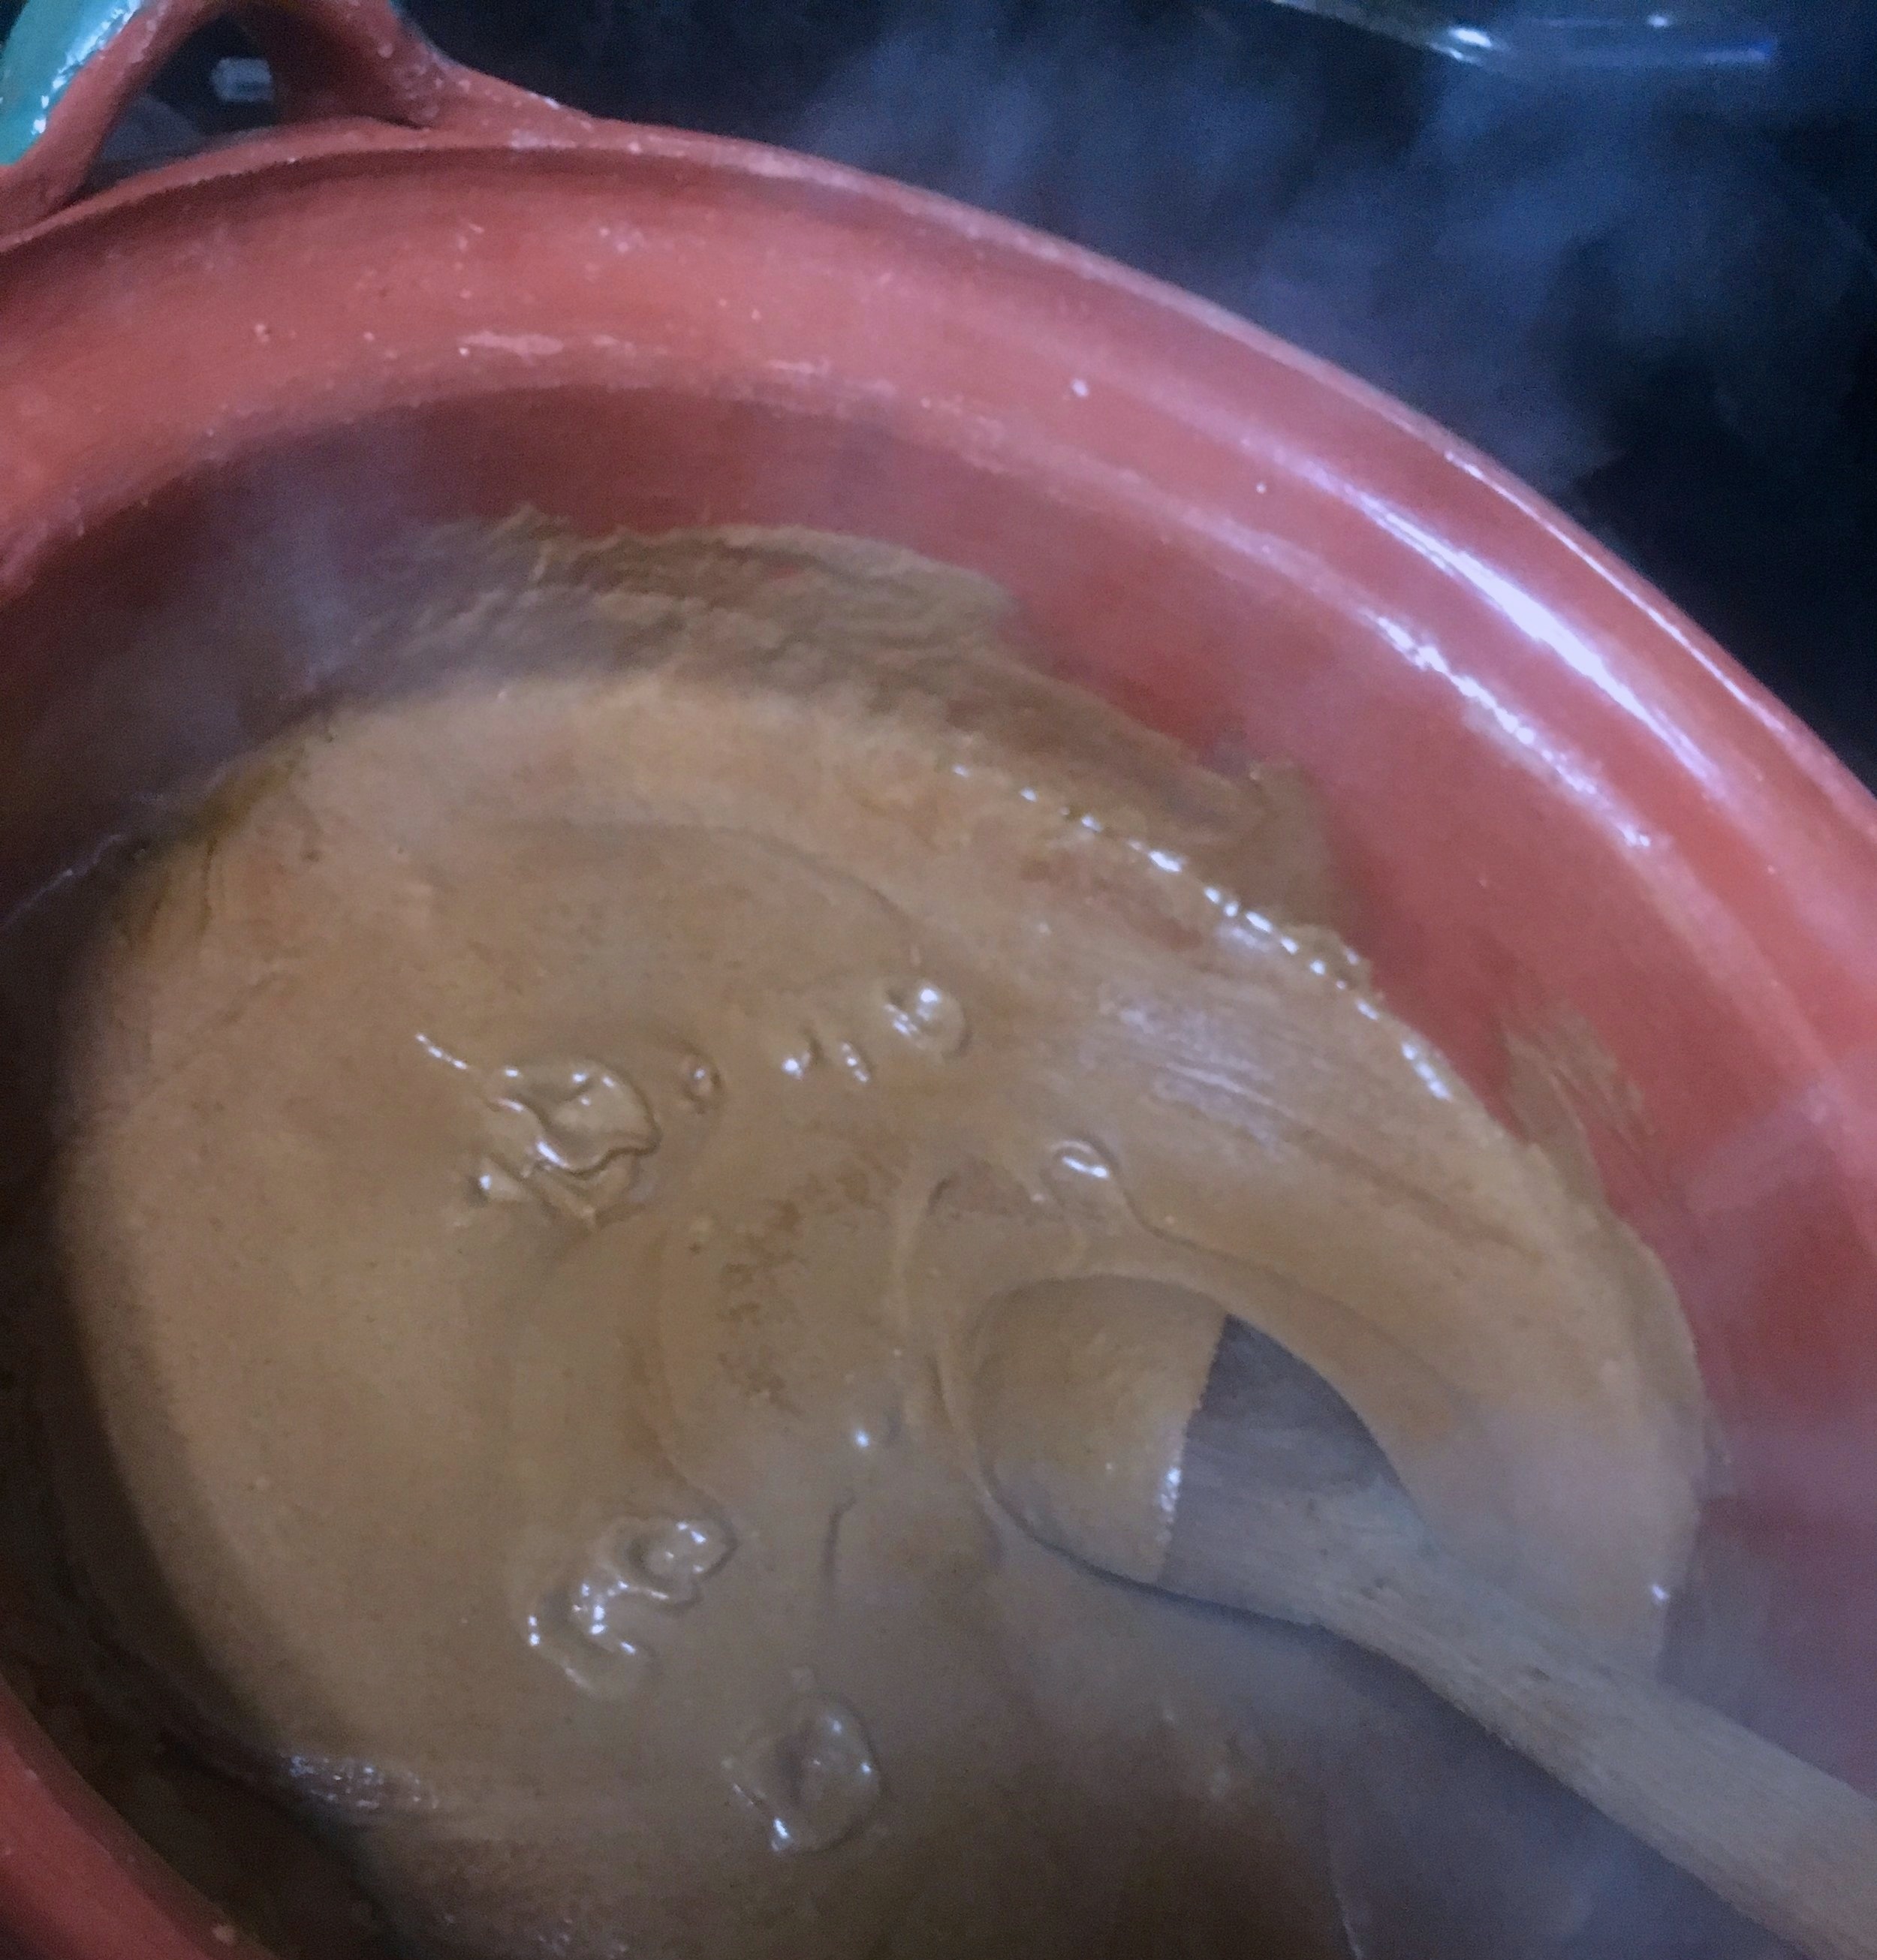
Heat the remaining 6 tbsp. of oil in a thick-bottomed pot or clay Cazuela over medium heat until hot. Add the puréed mole from your blender jar, being careful as the mole will splatter when it hits the oil (you may want to use a splatter screen). Add just a little more stock to your blender jar and swish around to get every bit of the mole, add this liquid to your pot, Cook your mole stirring constantly, until it gets slightly darker and thickens enough to coat the back of a wooden spoon, 10-15 minutes. Add more broth if needed. Season to taste with salt as needed.
You can save your mole in the refrigerator for 3-4 days or up to a week, or freeze your mole for up to one month. We recommend you divide your mole into two portions, one to use now and one to use later.
Urfa Biber Mole pairs well with any kind of poultry, pork or beef. I paired it here with Pulled Chicken on a Blue Corn Tortilla with Sweet Plantain Purée and topped with Queso Fresco.
FROG HOLLOW FARM peach sorbet with pink peppercorns & thyme

This is not an overly sweet sorbet, which makes it really versatile!Serve as an intermezzo or dessert, or even scoop onto a summer salad.
(Makes 8-10 servings)
8 Frog Hollow Farm Peaches (bruised peaches are fine!)
1 tbsp. Pink peppercorns
6 sprigs fresh thyme
1 piloncillo (if unavailable, sub ¼ cup brown sugar)

"Peach Sorbet" by thudfactor is licensed under CC BY-NC 2.0Photo by Thudfactor
1 tsp. rosewater (optional)
Easy- Prep Time: 30 minutes active, 4 hours passive
Instructions:
Cut peaches in half, do not remove pits. Put halved peaches in a medium, thick-bottomed saucepan and just barely cover with water. Add remaining ingredients. Cook over medium heat until ingredients come to a boil, then lower to simmer and continue cooking for 30 minutes. Remove from heat and allow to cool completely. Remove pits and thyme sprigs. Purée ingredients in your blender. Put your mixture in the refrigerator and allow to become cold, overnight is fine. Follow instructions on your ice cream maker to finish your sorbet.
FROG HOLLOW FARM Roasted Cherry Mole
CHERRIES ARE THE PERFECT FOIL FOR CHILES HUACLE NEGRO WITH their INTENSELY FRUITY UNDERTONES, AS WELL AS FOR THE MORE FAMILIAR DRIED CHIPOTLE CHILES AND DANDELIOn Chocolate’s Kokoa Kamili, Tanzania Chef's Chocolate with hints of ripe mango and caramelized red berries.

(Make 2 quarts, enough for 10-12 servings as a side to protein of 8-10 portions if served alone, with corn tortillas, of course! Prep time: active 2 hours. Cooking level: Intermediate to Expert)
Ingredients:
1/4 cup vegetable oil plus 6 tbsp.
1 large onion, sliced thick
6 garlic cloves
6 chiles Guajillo dried (widely available online)
4 chiles Chipotle, dried (widely available online)
4 chiles Huacle Negros, dried available through Oaxacan Zocalito Imports
8 oz. slivered almonds
6 oz. hazelnuts, peeled
4 cups Frog Hollow Farm whole fresh cherries
4 oz. raw white sesame seeds
2 sticks cinnamon, preferably Mexican
8-10 whole cloves
3 Star Anise
4 oz. quality dark chocolate, broken into pieces if using bar chocolate (at least 70% cacao, we recommend Dandelion Chocolate’s Kokoa Kamili, Tanzania Chef's Chocolate)
2 tsp. quality Balsamic vinegar
6-8 cups chicken or corn stock, plus ¼ cup to “clean” your blender jar
1-2 tortillas (day-old are better)
1 tsp. salt or to taste
Dry Roast:
Heat comal or a heavy non-stick sauté pan on medium-low and dry roast (so no oil) the chiles. They cook very quickly, you want them to have spots where they have started to blacken, but you don’t want them burnt. Work with cooking thongs, watch chiles carefully, turning frequently. Next, cook the onion and garlic on the comal until they are golden brown with some blackened spots, 4-6 minutes, turning the onion over once, until it becomes translucent and charred on both sides.
Sauté:
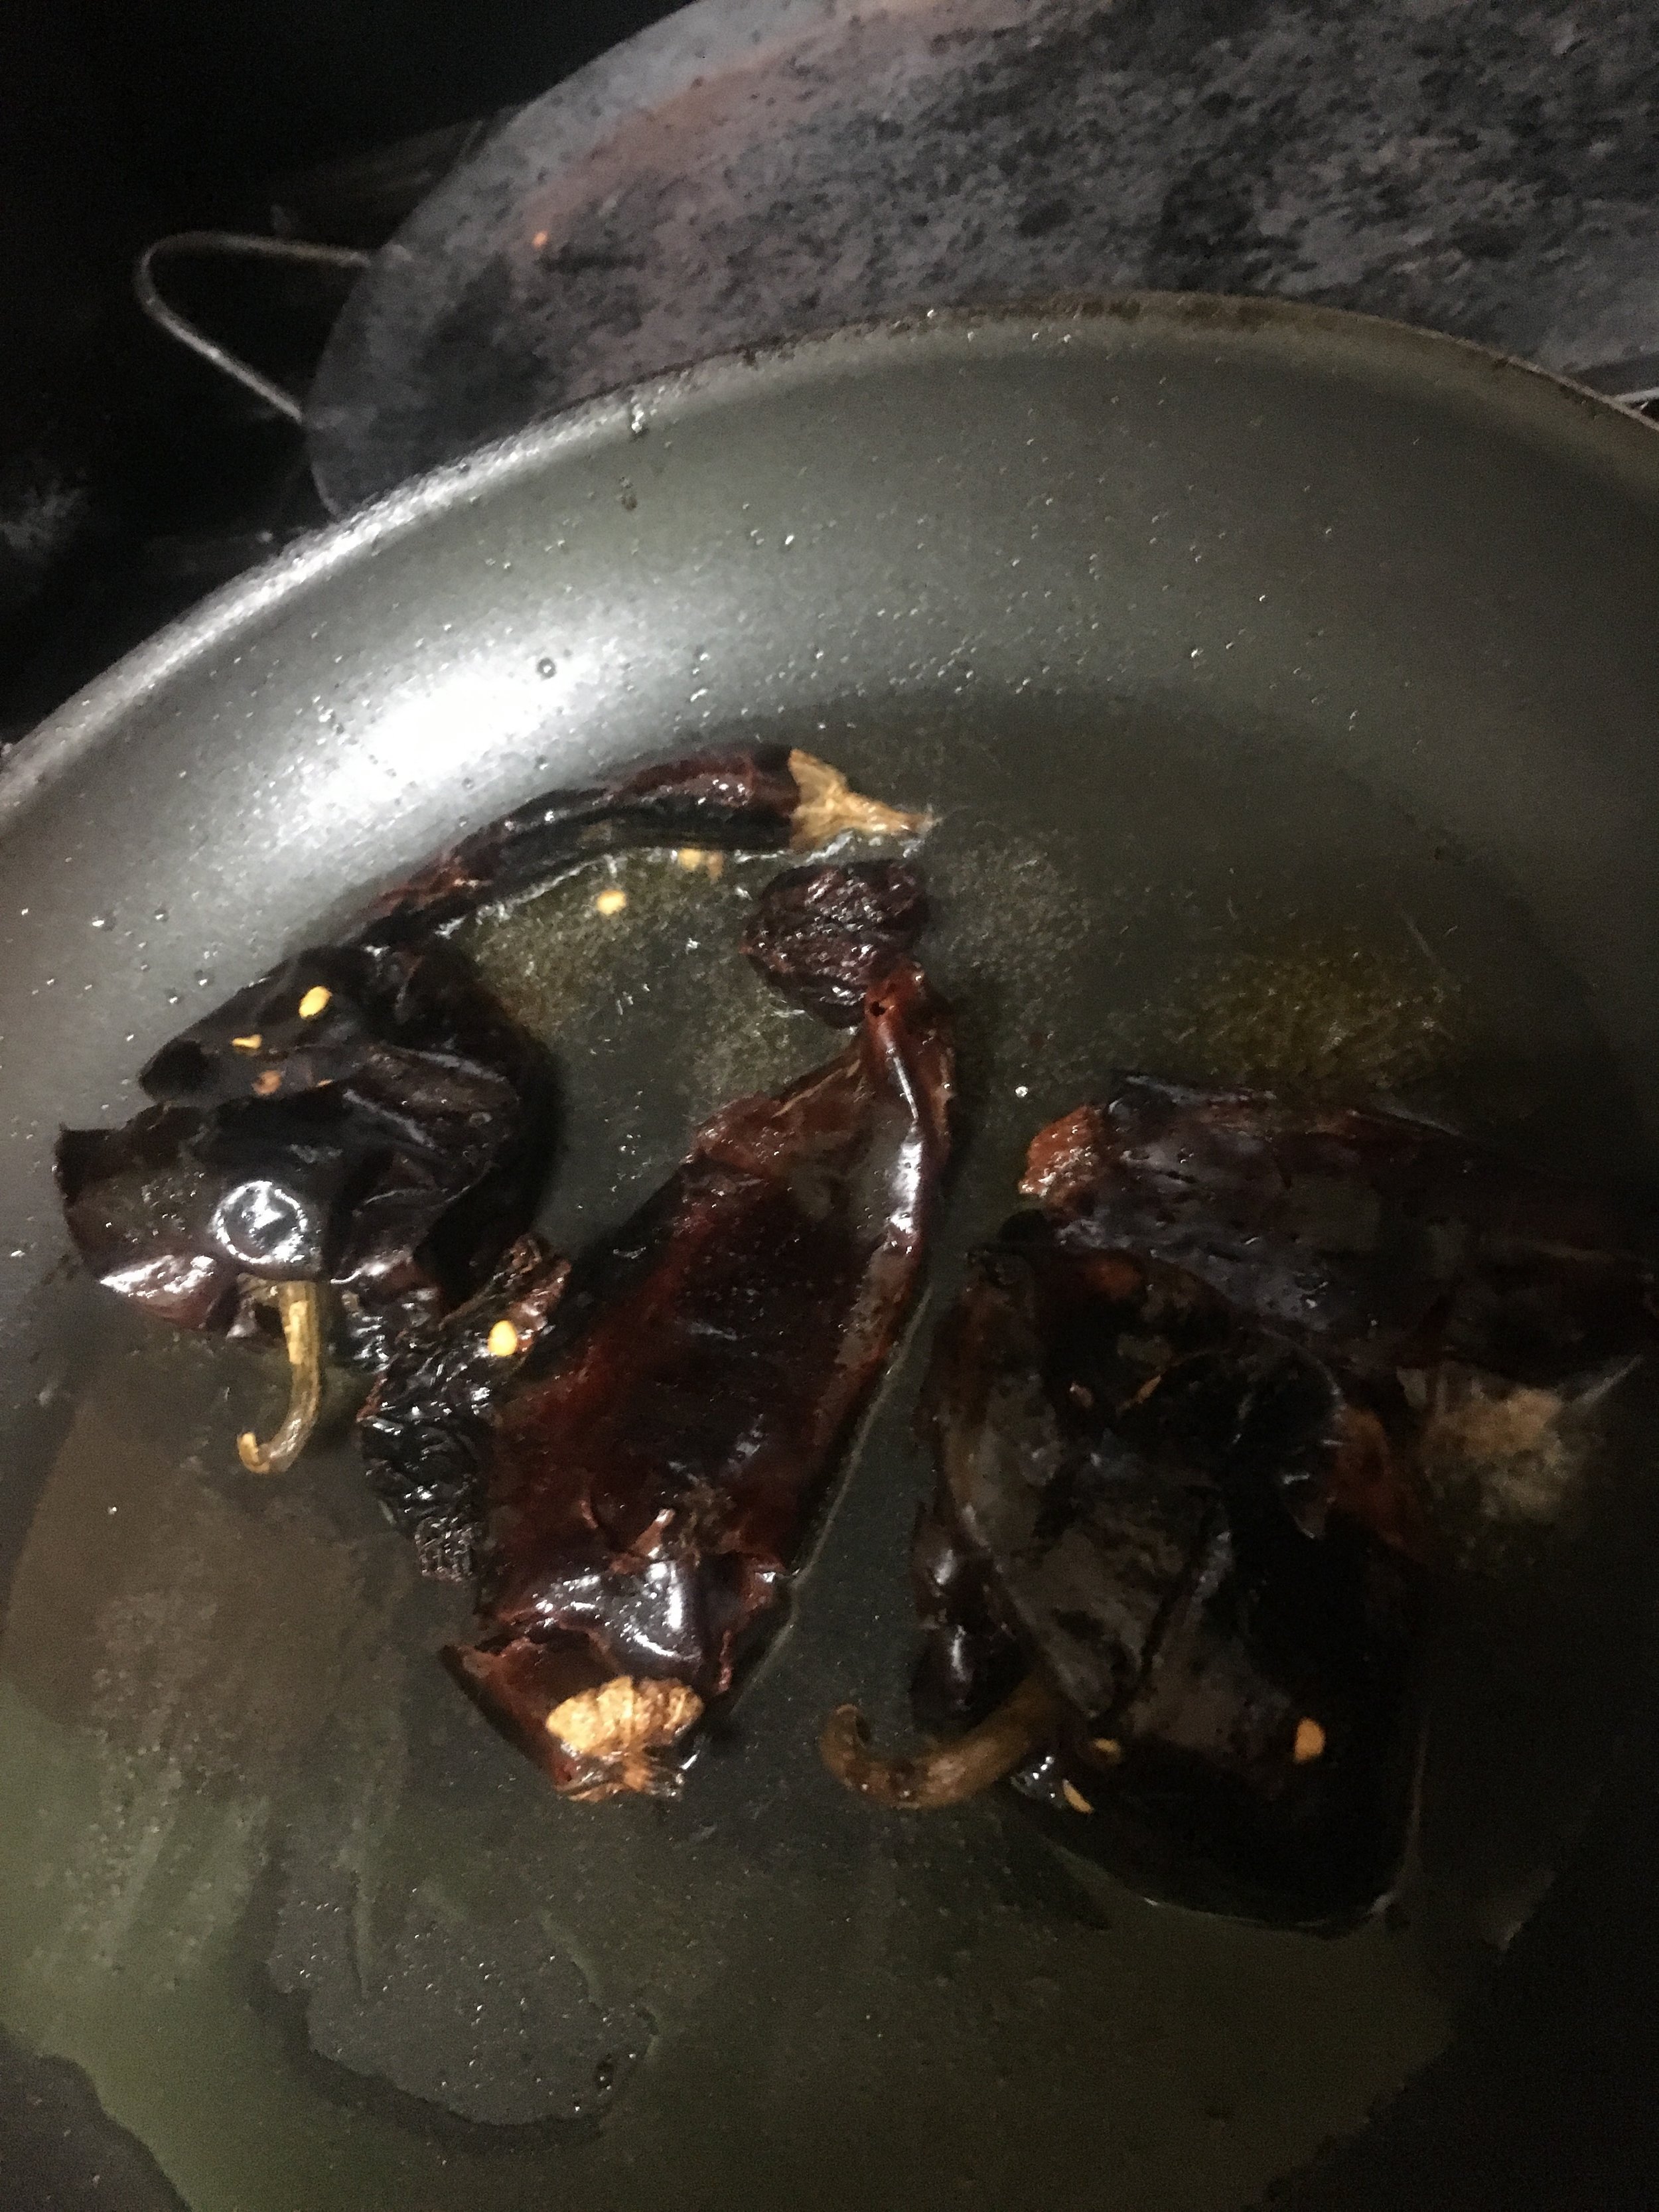
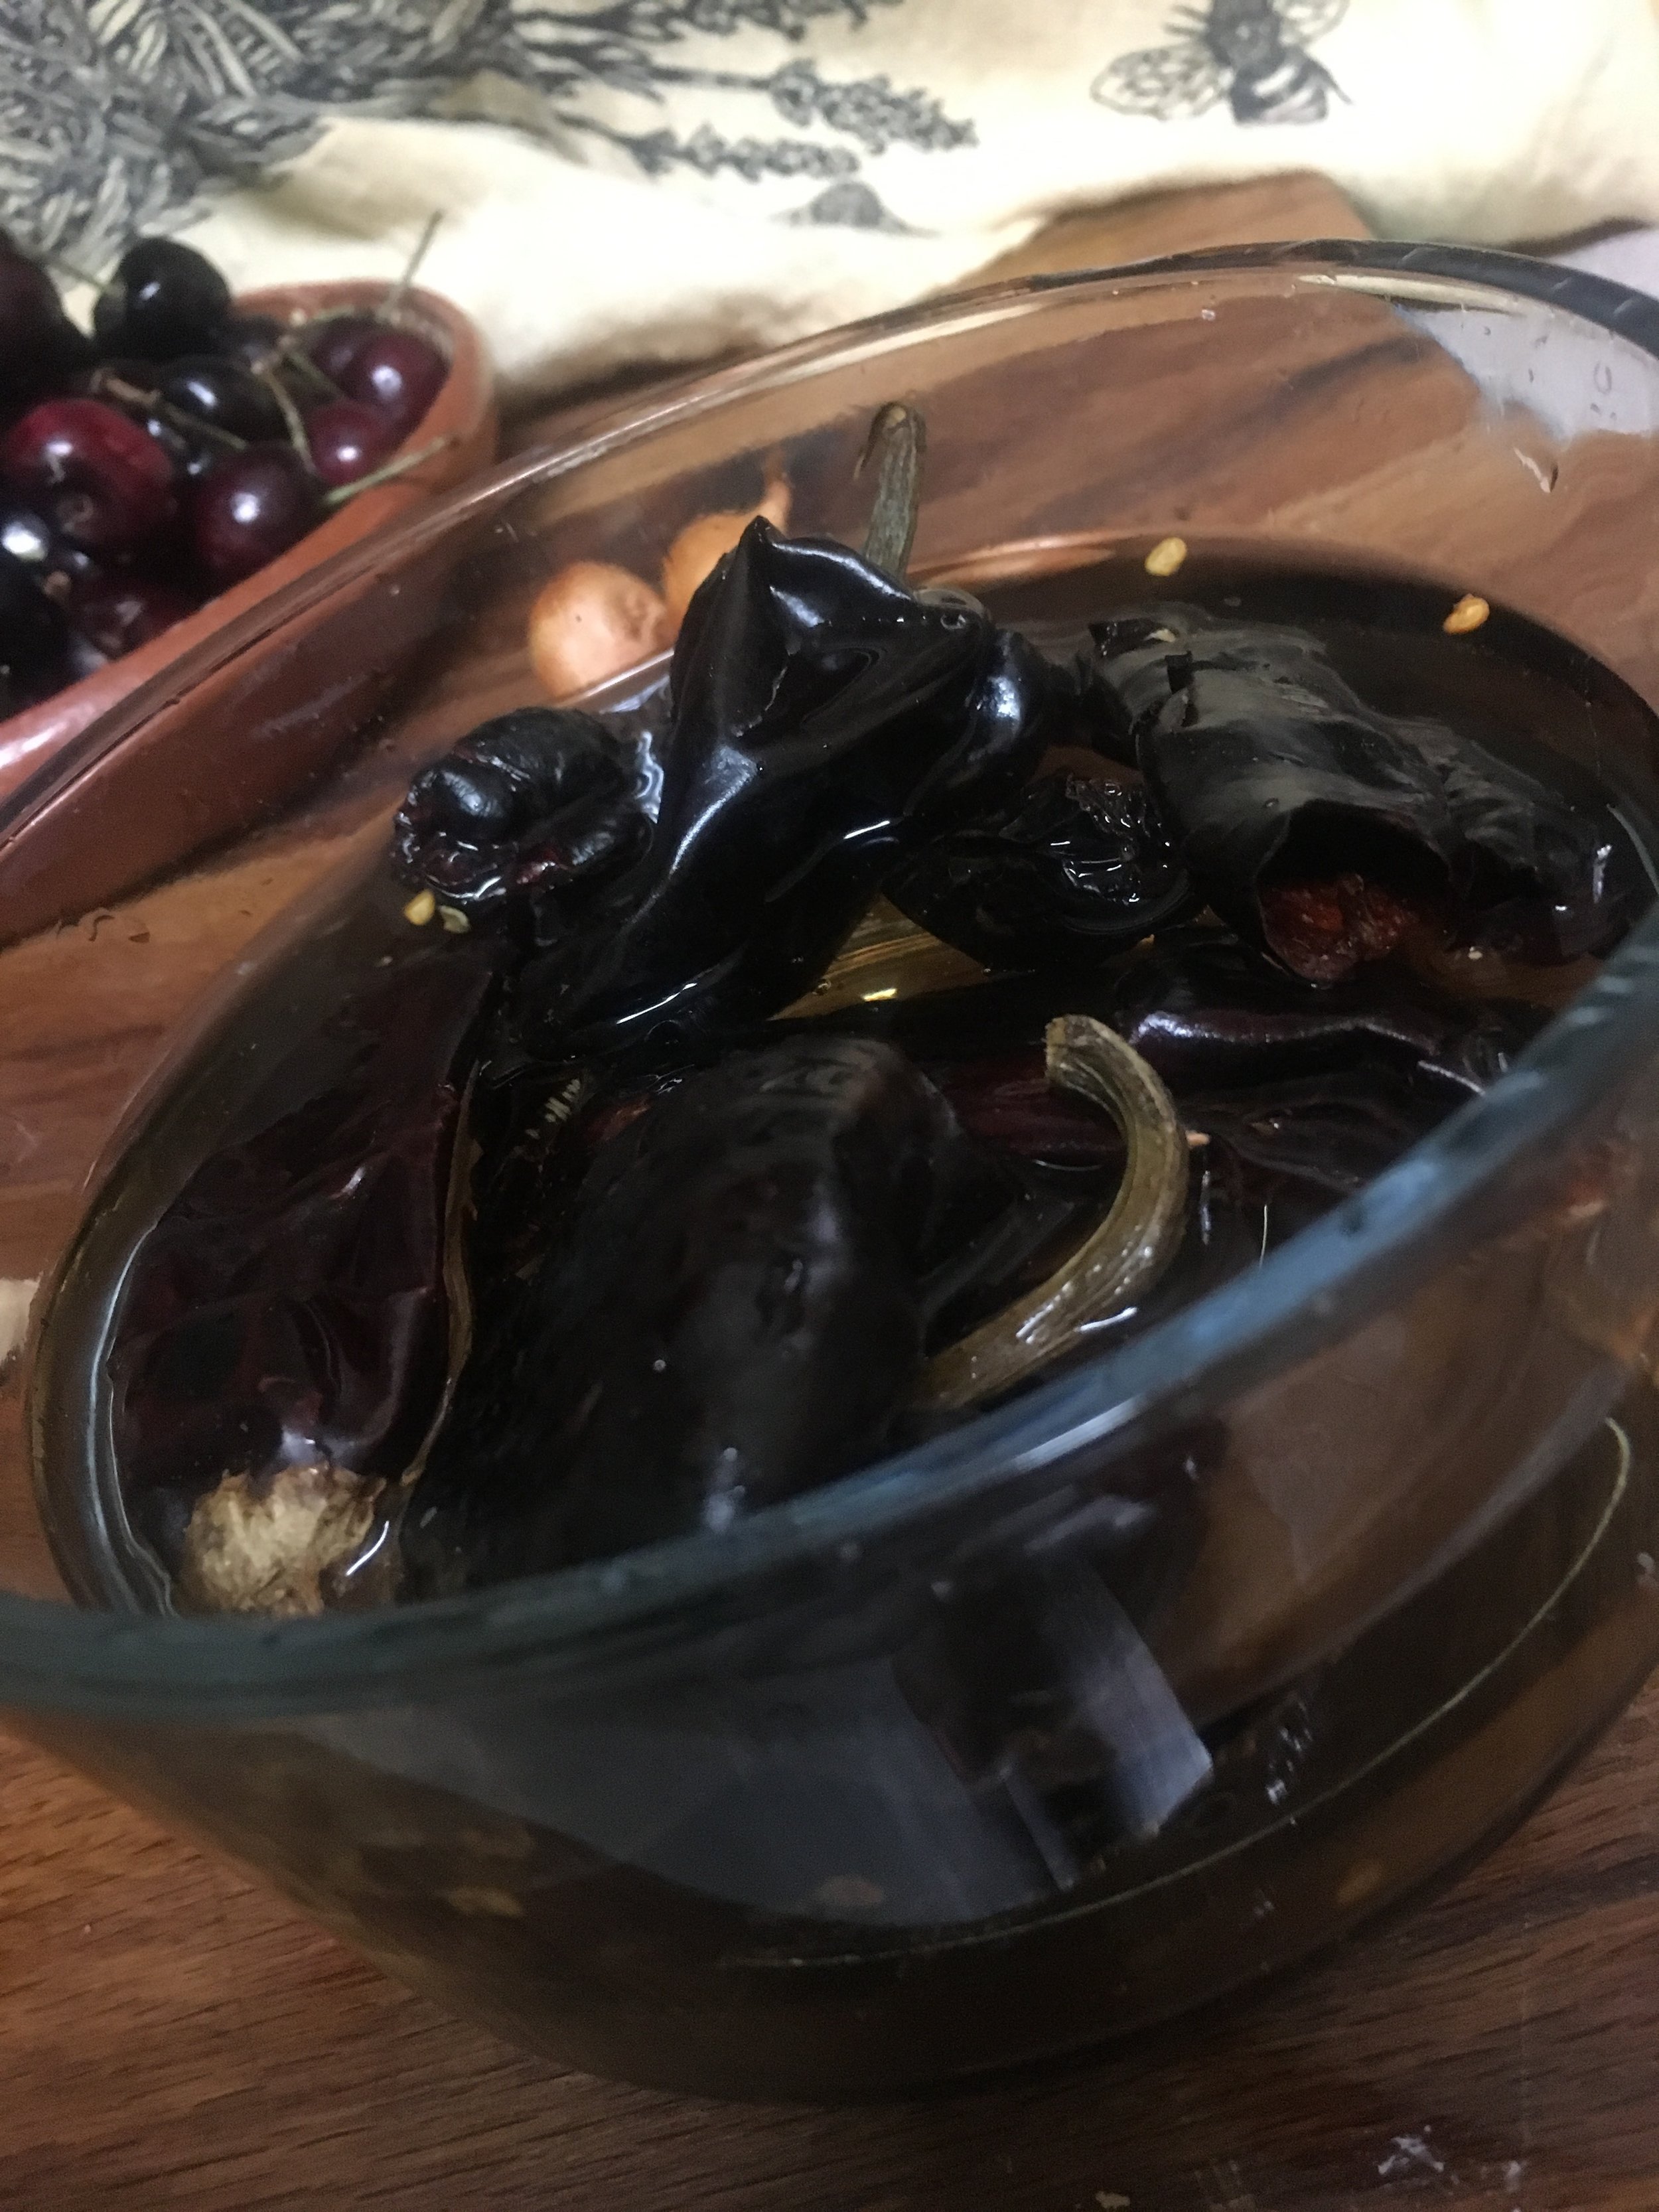
Heat 1/4 cup of the oil in a heavy sauté pan on medium heat. Fry the chiles until they puff up and slightly change color, turning frequently (figure 1). This is very quick, no more than 30 seconds . Transfer chiles to a glass bowl and add cold water to cover; soak for 20 minutes (figure 2).
Using the remaining oil from frying the chiles (sauté each of the following separately so as to strictly control cooking time):

Prepping tortilla
· Sauté the almonds, moving them around in the pan, until they start to brown, about 2 minutes.
· Sauté the hazelnuts moving them around in the pan, until they start to brown, about 2 minutes.
· Sauté the cherries (do not remove the pits), moving them around in the pan, about 1 minute (for a more smoky mole, you can dry roast the cherries on the comal instead of sautéing them).
· Sauté the cinnamon stick, cloves and Star anise, turning over once, about 2 minutes.
· Sauté the sesame seeds, they cook very quickly, be careful not to burn them.
Now you are ready to add all of the sautéed ingredients to your blender, scraping all the sesame seeds, along with whatever oil is left in your pan, into the blender.
Prep cherries and chiles:
Allow cherries to cool so you can work with them. Working over a bowl, remove the pits being sure not to miss any. The pitted cherries will now go into the blender jar. Add the cherry juice that has accumulated in the catch bowl to the blender jar as well, making sure not to accidentally add and cherry pits.
Remove chiles from water (they should be soft) and remove the stems, veins and seeds. Reserve the seeds.
Prep one of your tortillas: Using long tongs with metal tips, hold the tortilla directly over a medium flame directly on your burner, turning it over frequently and continue cooking until some charred spots start to appear on both sides. Add to blender.
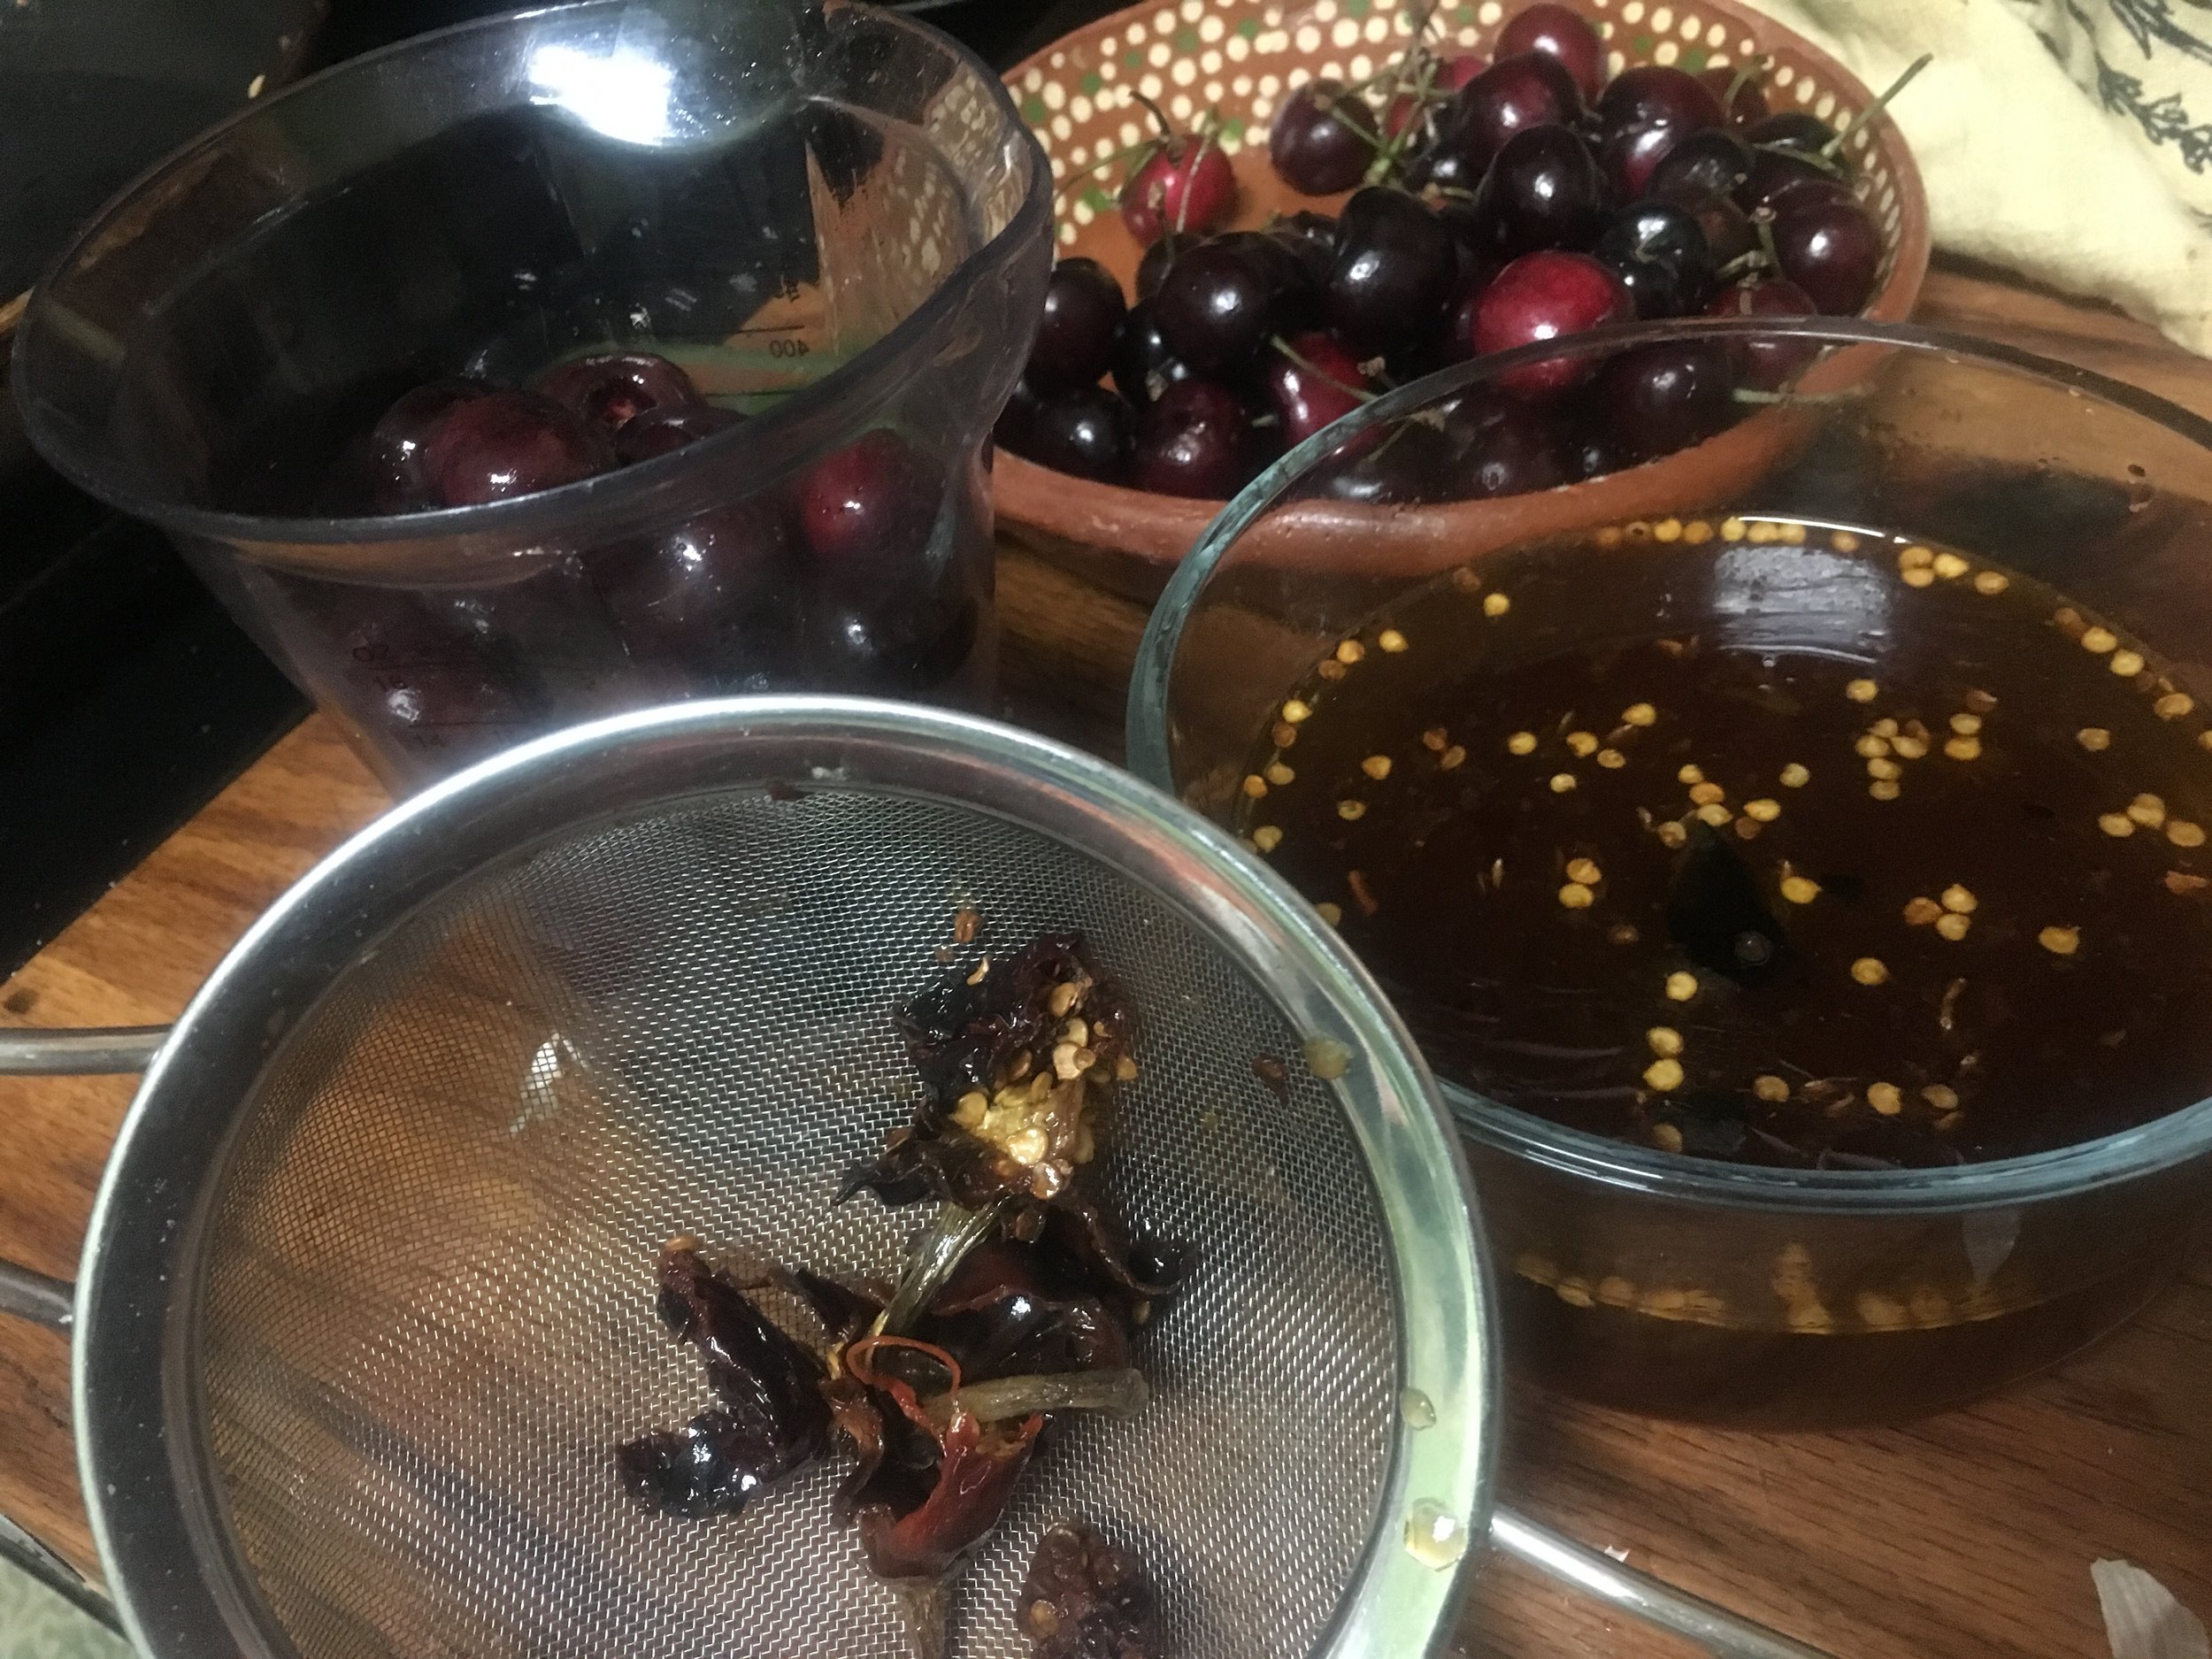
Figure 4. Blend: Add the chiles to you blender jar (which already has all your sautéed ingredients, your cherries and your tortilla), along with 1 1/2 cups of stock and the chocolate, vinegar and salt and blend well until you have a very smooth puree. You will need to work in two batches. No need to worry about dividing the ingredients evenly between the batches, as everything will end up together.
Mole should cover the back of a wooden spoon
Adjust your mole for taste and texture:
Mix your two batches of mole well. Your mole should be the texture of a thick spaghetti sauce. If it is too thick, add more stock. If it is too thin, add another tortilla. Blend again. Taste your mole and if you feel it needs more heat, sauté some of the reserved seeds from the chiles in a little oil, add to your mole, blend well and taste again. Add the seeds little by little until you achieve the desired result. Check for salt and add more if needed at this point.
Cook off your mole:
Heat the remaining 6 tbsp. of oil in a thick-bottomed pot or clay Cazuela over medium heat until hot. Add the puréed mole from your blender jar. Add just a little more stock to your blender jar and swish around to get every bit of the mole, add this liquid to your pot. Being careful as the mole will splatter when it hits the oil (you may want to use a splatter screen). Cook your mole stirring constantly, until it gets slightly darker and thickens enough to coat the back of a wooden spoon, 15-20 minutes. Add more broth if needed. Season to taste with salt if needed.
If using immediately, add cooked poultry to the mole and continue cooking over a low heat until poultry us heated through and through, about 15 minutes. If using duck, no not add to mole to heat, as the duck fat will change the flavor of the mole. Instead, heat duck in the oven or a pan, as you would normally, and serve with mole. Garnish dish with a few fresh cherry halves.
You can save your mole in the refrigerator for 3-4 days or up to a week, or freeze your mole for up to one month. We recommend you divide your mole into two portions, one to use now and one to use later.
ARUGULA SALAD WITH POMP & WHIMSY-INFUSED BRULEÉ RUBY RED GRAPEFRUIT
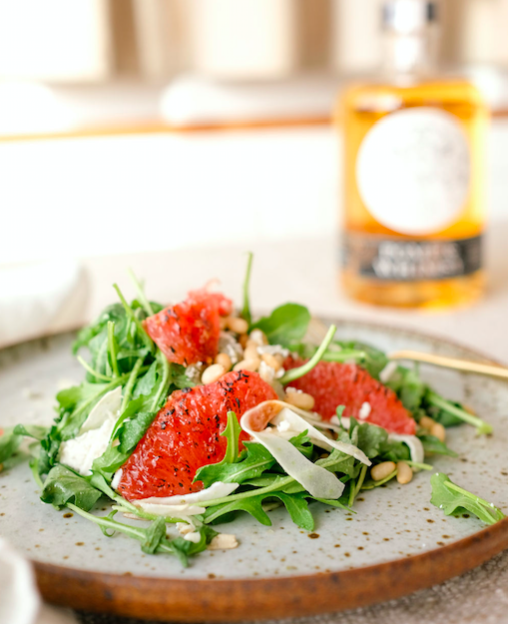
Pomp & Whimsy, bringing modern sensibilities to the tradition of gin making, by infusing classically distilled gin with a natural, delightfully flavorful botanical liqueur.
The result is a highly refined, yet playfully sensorial spirit, that is both graceful by itself, and effortlessly dressed, up or down.
Photo by Bessie Lacap, Speckled Plate available through Piece of Clay
Pomp & Whimsy Gin Liqueur’s herbal notes and sweet side are the perfect foil the grapefruit’s acidic nature. Brulée the grapefruit to enhance the flavors and give this salad an extra special look.
(Makes 4 servings)
4 cups loosely packed arugula
3 ruby red grapefruit
4 oz. Pomp & Whimsy
4 oz. brown sugar
4 oz. toasted pinenuts
4 oz. Ricotta Salata, coarsely grated
12- 16 Gooseberries (optional), washed, top bit removed and halved
Salt to taste for the dressing
Finishing salt
Citrus Pomp & Whimsy Vinaigrette (see recipe, below)
Prepare grapefruit by removing skin and sectioning with a very sharp chef’s knife, working over a glass bowl (there are various videos on YouTube which will show you how to do this if you haven’t done it before). You should have a bowl of grapefruit sections with no membrane. Save the membrane and extra grapefruit that haven’t come of with the sections.
Remove all grapefruit juice from the bowl and reserve. Add 2 oz. of Pomp & Whimsy to your grapefruit sections and allow to sit for about 5 minutes. Using a slotted spoon, carefully remove your grapefruit sections to a baking sheet that have been lined with aluminum foil. Lay the sections out so they are not overlapping. There should be little or no liquid on your baking sheet. Sprinkle brown sugar over the grapefruit sections. If you have a chef’s torch, proceed to brulee the grapefruit sections until they start to caramelize (just on one side, the side facing up). If not, you will need to raise the oven shelf in your broiler so that it is as close to the flame as possible. Turn your oven to broil and place the baking sheet on the oven shelf. Broil until the grapefruit starts to caramelize. Watch the grapefruit sections carefully; the difference between caramelized and burnt is 15-20 seconds.
Cool grapefruit sections. Meanwhile, squeeze the reserved grapefruit membrane and collect the juice in a bowl. Add to your reserved grapefruit juice. Prepare your salad dressing using the following proportions:
Citrus Pomp & Whimsy Vinaigrette
1/4 cup grapefruit juice
1/2 shallot, minced
1⁄2teaspoon Dijon mustard
1 teaspoon Pomp & Whimsy Gin Liqueur
1⁄8 teaspoon salt or to taste
1⁄8 teaspoon pepper
1/2 cup Extra Virgin olive oil
Blend ingredients with an immersion blender or other mixer to create an emulsion between the citrus and the oil.
Toss arugula with dressing and any grapefruit sections that are not whole just before you are ready to serve the salad, if using gooseberries, toss them in as well. Plate the arugula salad. Arrange grapefruit whole grapefruit sections on top of the arugula with the caramelized side facing up, dividing them evenly between the 4 plates. Sprinkled with toasted pinenuts and grated Ricotta Salata, finish with a light dusting of finishing salt.
Pomp & Whimsy Poached Pears
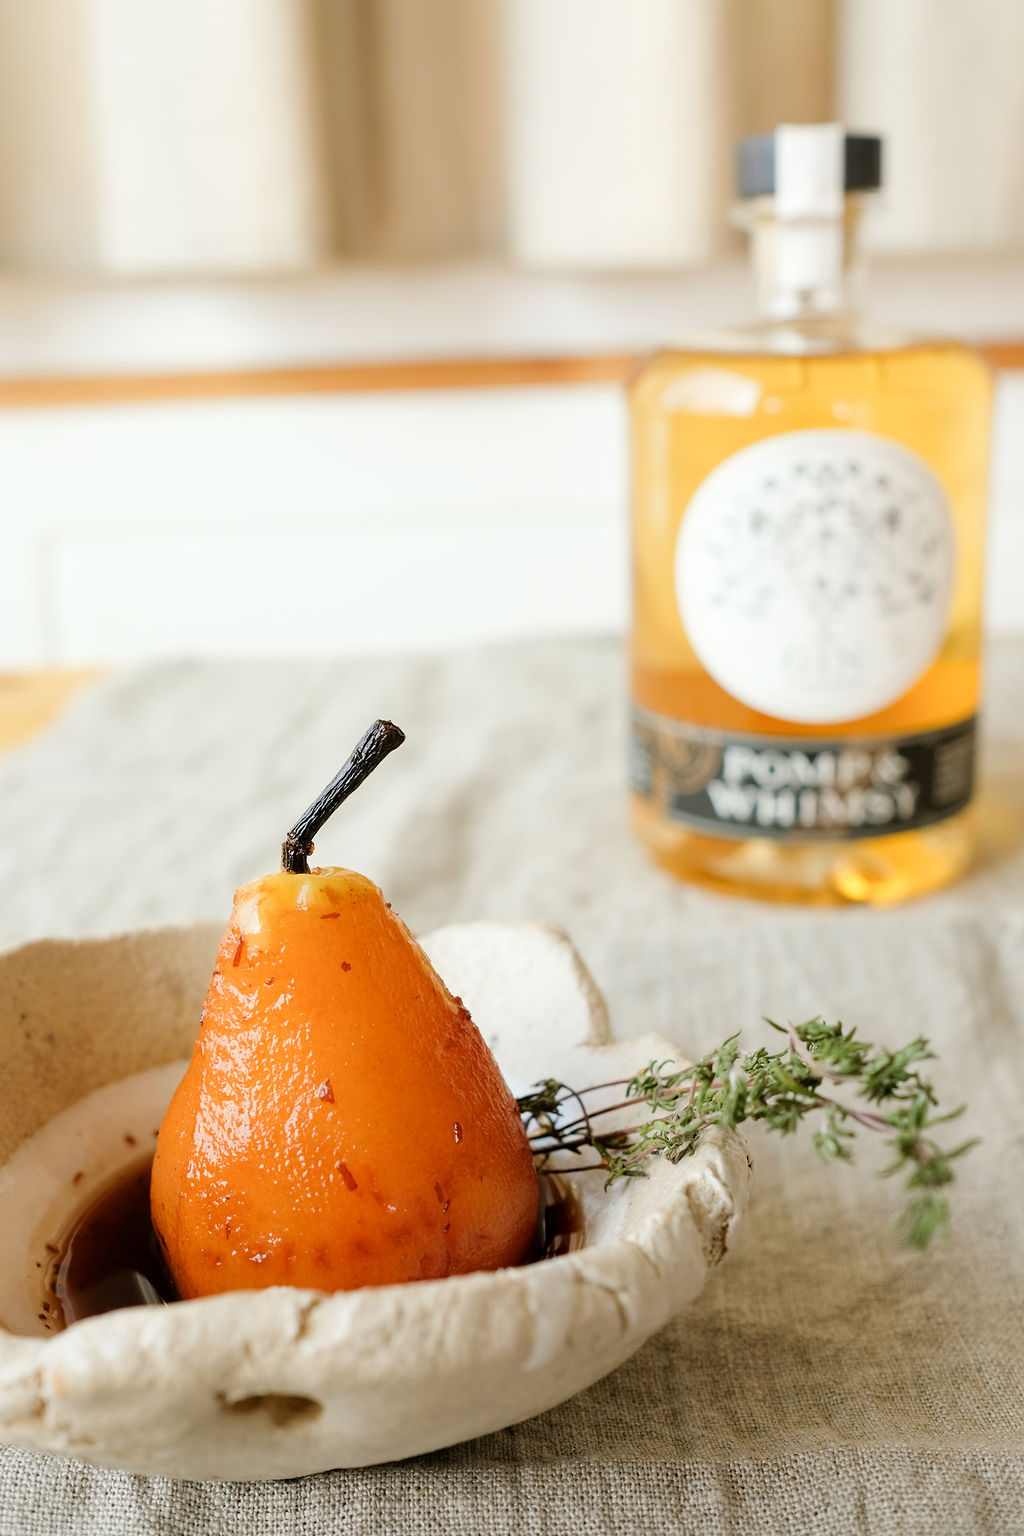
Pomp & Whimsy, bringing modern sensibilities to the tradition of gin making, by infusing classically distilled gin with a natural, delightfully flavorful botanical liqueur.
The result is a highly refined, yet playfully sensorial spirit, that is both graceful by itself, and effortlessly dressed, up or down.
Photo by Bessie Lacap, Torn Bowl available through Piece of Clay
(Makes 6 servings)
7 firm pears, any kind that are in season
2 cups Riesling
5-6 oz. Pomp & Whimsy Gin Liqueur
1 Cinnamon stick
1 Star anise
1 Piloncillo, available in Latin/Mexican markets (or 3 oz. of brown sugar if unavailable)
4 cloves
4 Juniper berries’
Peel pears and leave whole with stem intact, use immediately after peeling so pears do not oxidize. Add 2 cups of Riesling, 3 oz. of Pomp & Whimsy, one piloncillo (or 3 oz. brown sugar if unavailable), one stick of cinnamon, 4 cloves, 4 juniper berries and pears in a saucepan large enough to accommodate all the pears, but just barely. Add water to cover pears. Bring to a boil and reduce immediately to a low simmer. Simmer for 15-20 minutes.
Make one extra “tasting” pear. This is the one you will check the texture. Remove pears after 15 minutes, check texture. Pears should be still a little firm but not hard (not soft either). Continue to cook if needed to achieve desired texture. Remove pears and allow to cool. Turn pot up (without pears) to a full boil. Boil until reduced by half. Remove from heat, cool and add Pomp & Whimsy to taste. Can me made up to 3 days in advance. Store pears in the refrigerator with the syrup you have made. To serve, if pears are small, serve whole, if larger, cut in half (tip to base) leaving the stem on but using a small spoon, “carve” out the core, that’s the small area where the pits are, after you have cut the pear in half. Serve with a mint or tarragon leaf.
HOW MUCH FOOD DO I NEED FOR A COCKTAIL PARTY?
When planning food for a cocktail party, how much to serve is determined by the length of your event. Assuming there is no main course or dinner to follow, you should figure 5-7 nibbles per guest for the first couple of hours, then 4-5 nibbles for the next couple of hours and if your event goes longer, just 3 or so bites during the final hours. You may want to switch from savory to sweet bites towards the end of your event.
If you decide to go with "Small Plates", which are heavier than traditional appetizers, or a combination of both appetizers and small plates, you should count each small plate as two appetizers. Your chef or caterer is there to help you with planning, so don't feel you have to manage all this on your own. Remember, some guests may want to enjoy more than one serving of a particular appetizer.
Having everything ready so your chef or caterer can do their very best is key.
IN THE KITCHEN
Your dishwasher should be empty (and working– if your dishwasher is NOT working, you’ll want to let your chef know as they will need to hire a person to wash dishes by hand). If you have any china that you are planning to use that cannot go into the dishwasher, your chef will also need to know and have someone available to wash dishes.
IF ANY of your kitchen surfaces including stove top, floors, counters) require ANY special care or cleaning, please inform your chef upon their arrival. All kitchen surfaces should be made available, so as much as possible, store your small appliances and kitchen decor. For plated dinners, especially for larger crowds (more than 8-10) you may want to make an extra space available for plating. In some cases, this may even mean renting a table.
Make some space available in your refrigerator (more space will be needed if you have extreme perishables on the menu, like seafood).
Provide large garbage bags, make sure your receptacles are not too full to receive the refuse from your event. We strongly prefer to have: recycling/compost/garbage.

RENTALS, GLASSWARE & BAR & COCKTAIL NAPKINS
PLEASE NOTE THAT OUTSIDE RENTALS (SO THOSE PROVIDED BY THIRD PARTY VENDORS) NEED TO BE SECURED EARLY AS THERE IS HIGH DEMAND IN DECEMBER.
If your event is a sit-down dinner, you will need glasses for the table (water and wine, and if you are pairing wines you may need red and white wine glasses) as well as bar glasses and/or wine glasses if you are having a cocktail hour, or champagne glasses if there is a toast. You should figure 2 glasses per guest for the bar, more if you are having a cocktail party. Your chef or mixologist can help you figure out what kind of specialty glassware you may need based on your bar menu. If you don’t own enough glassware, your chef may be able to provide rentals or recommend a reliable local party rental company.
Don’t forget cocktail napkins and ice, one bag of ice per each ten guests is recommended plus additional ice for cooling if you are having beer, soft drinks and/or white wine.
It is best to either have water pitchers for the tables or provide bottled water for cocktail parties.
Have a plan for receiving, storing and pick-up of third party/outside rental items. Most rental companies deliver the day before or day of your event and someone needs to be home to receive these (a specific delivery window can be arranged for an additional charge). After your party, these rental items will be returned to their storage/shipping crates but will be scraped, not washed as is this is what is required by almost all rental companies. You’ll want to have a place these items can stay overnight (or until Monday for Saturday parties) when they will picked up by the rental vendor. Someone will need to be home to facilitate the pick-up as well.
DON’T SURPRISE THE CHEF! (GUEST COUNT, LAST MINUTE MENU CHANGES & OVERTIME CHARGES)
In most cases, the average time required to set-up, cook/serve and clean-up for a dinner or cocktail party is 5 hours. If you anticipate that your party will last long then 3 hours from the time your guests are served their appetizers until the time dessert is served, please be sure to let your private chef or caterer know. Things that can make your party longer than average are toasts (as in milestone birthday or anniversary) or any other interruptions in the flow of the meal service. or when guests arrive much later than anticipated and service is delayed. While this doesn’t mean you need to impress upon your guests that they arrive on time, it does mean that you communicate clearly with your chef. After all, you know the crowd!
If there are additional people who need to eat (i.e. your musicians, your babysitter) please advise us in advance and we will gladly increase your guest count. If your guest count INCREASES less than 72 hours prior to your event, we are happy to add your additional guests and provide additional food, rentals and if required and available, additional service staff, so please do let us know. Most private chefs and caterers work with a “Minimum guest count policy” which means that If your guest count DECREASES less than 5 days prior to your event, or the number of guests who attend is less than your contract, you will be charged based on the guest count in your contract.

PETS, SHOES AND GUEST TRAFFIC THROUGH THE KITCHEN
We all love dogs, but not in the kitchen. For the safety of your pets (there’s hot stuff goin’ on in there) and catering staff, it’s best if you can keep your best friend elsewhere during your dinner party or catered event.
Although it may seem obvious to you, it may not be to some of your guests, especially if they are friends and family accustomed to making themselves at home in your kitchen; it’s not ideal to have guests opening the refrigerator to look for beverages, trying to be helpful by serving themselves seconds, or looking for a snack. Catering staff is there to attend to your guests’ every need and are happy to do so. A little extra planning (like having a cooler full of bottled water somewhere where people can easily help themselves) goes a long way towards preventing kitchen accidents.
All staff must wear shoes, as this is a safety issue. Catering staff cannot wear shoe covers, they are hazardous.
FOR BASTILLE DAY: FRENCH-MEX DESSERT ART
July 14th is Bastille Day, so we're celebrating by sharing this French-Mex culinary gem: El Arte Floral en Gelatina...
... originally from France, and doubtless an import that arrived along with La Comida Afrancescada, introduced in the 1800's by the brief yet important colonization of Mexico by the French (ending in the infamous Battle of Puebla on the 5th of May, or Cinco de Mayo, which is NOT, by the way, the anniversary of Mexican Independence- this is Sept. 15!).

Gelatina Artistica by Sweets Collections
"With the empire of Maximilian and the presidency of Porfirio Díaz came what is now known in Mexico as La Comida Afrancescada. Some of the important cooking methods and ingredients of this fusion were caldos (broths), baño a la Maria (the method of using vapor to cook, as in a double-boiler or placing a baking pan in a casserole of water in the oven, which is how flan is made- see Mexican cooking secrets:flan) and chiles en nogada (stuffed chiles in walnut sauce), among many others.
If there's a Mexican "barrio" where you love, you've probably seen them in push carts (in San Francisco, you'll find these along the Mission), pretty little gelatin desserts with raisins, nuts or fruit fillings, usually layered. They're prevalent in food markets throughout California with its large Mexican population, these "Jello" creations, probably because in Mexico, gelatin desserts are "eaten daily in nearly 90% of Mexican homes. Mexicans consume more gelatin desserts than nearly any other country in the world—three times the quantity of gelatin consumed in the United States alone. In restaurants, the dessert tray will almost always include a variety of gelatin desserts"(according to Mexico Cooks). Whether its a birthday party, baptism or "quinze" (quinzenera- a celebration much like our "Sweet Sixteen" parties, these large family gatherings are practically de rigor in Mexico) the dessert is usually a beautifully crafted gelatin.
Gelatin artists (yes, there are many Señoras who are famous for their Gelatina Artistica in Mexico, they even give classes and are quite competitive about who is the reina de la Gelatina) take these healthier cake alternatives to a whole other level, (see slide show, left, for examples). Using a a fine flavor injection tool, 3-dimensional creations are set in a transparent gelatin base, all 100% edible including the intricate flowers.
Rosa Rodgriguez' Sweets Collection
Gelatina Artistica, relatively unknown in the United States, has arrived in San Francisco with Mission resident Rosa Rodgriguez' Sweets Collection, now selling at La Cocina's Ferry Building stall, where you can meet the artist on Saturdays and ask anything you like about her amazing creations. Rosa found an outlet for her passion for art, which she discovered at the age of five, "falling in love with the great works of Frida Kahlo and Diego Rivera" in her completely edible creations, putting to work her background as a painter and illustrator. Her gelatin desserts are "a healthy alternative", says Rosa, " designed to inspire children and adults to slow down, savor every bite, and value their health."
Chef Andrea Lawson Gray is proud to work with Rosa, pairing her Gelatinas Artisticas (sweet or savory) with our Comida Afrancescada and Californio menus.
Californio BBQ Menu w/ recipes
Menu
Tequila-infused Jicama and Watermelon Guacamole (recipe below)
Elote - Mexican-style Corn on the Cob (recipe below)
volcanes- grilled baby cactus paddles
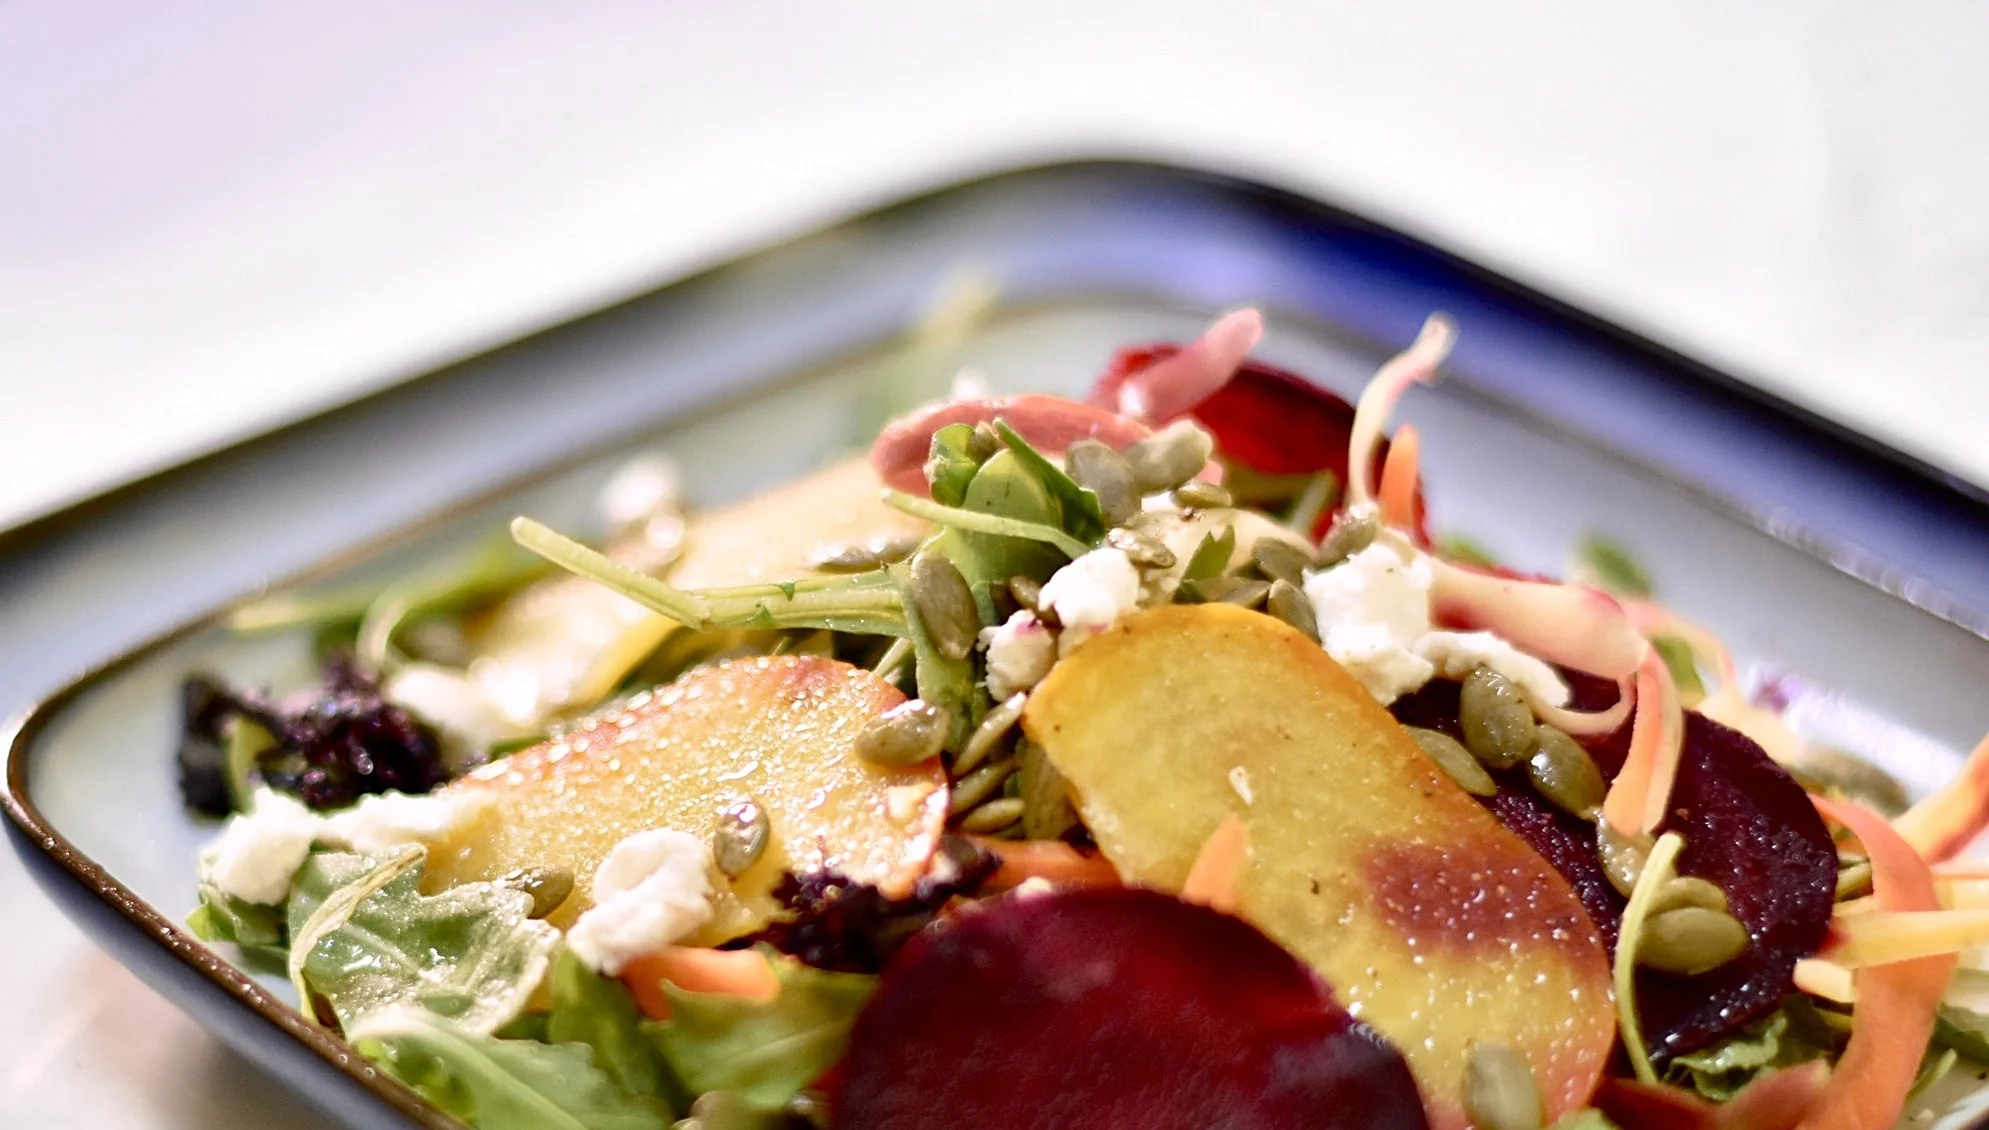
Coal-cooked Beets topped with Goat Cheese, Cilantro & Onions
Californio Baked rancho Gordo Frijoles de Olla - Clay Pot Black Beans (recipe below)
Grilled Steaks- Carne Asada
Handmade tortillas

Tequila-infused Jicama and Watermelon Guacamole
(Serves 4–6)
Before you start
Prepare Tequila-infused watermelon (see A), prepare at least 4 hours in advance
Ingredients
5 large avocados, diced to ½”
Juice of 2 Mexican limes
¾ tsp. salt
½ Spanish white onion, chopped

5 sprigs cilantro, coarsely chopped
2 Serrano chiles or jalapeños (to taste, see Guide to Chiles) seeded, deveined, and minced
2 medium jicama, peeled and diced to ¼”
1 small seedless Tequila-infused watermelon and diced to ½” or smaller
In a bowl, partially mash avocados with a fork; add lime juice and salt. Add onion, cilantro, ½ of the chiles, jicama and fold gently, taking care not to mash avocados more than you have to. Taste for salt and seasoning. Add more chiles as needed. Add watermelon and fold gently. Leave a couple of avocado pits in your guacamole to help maintain green color. Refrigerate 2 hours; serve immediately with tortilla chips (see Basic Recipes for Californio Cooking).
A. Tequila-infused Watermelon
Before you start
You’ll need: a funnel and a towel
Ingredients
Small seedless watermelon
375 ml. bottle of Tequila
Wash watermelon and pat dry. Set the watermelon on a towel, situating it so it will not roll over. Cut a hole in the watermelon that is the size of the tip of the funnel you are going to use. Put the funnel in the hole and press down gently so it goes into the meat of the melon. Pour tequila into the funnel, refilling as needed, until you have used most or all of the tequila. Allow the melon to season at least a few hours before using, with the funnel still in place.
Elote (Mexican Corn on the Cob)
(Serves 6-12 depending upon portion size, or 24 small bites as an appetizer)
Before you start
Prepare Chipotle-lime butter (see Basic Recipes for Californio Cooking)
You’ll need: wooden chopsticks or similar
Ingredients
6 very fresh corn ears, husks and silk removed
3 sprigs Mexican or regular tarragon
1-cup Chipotle-lime butter
1 cup grated Cotija cheese
Salt to taste

Bring a large pot of water to a rapid boil. Add salt and Mexican tarragon. Cook for 4-5 minutes. Once corn cools down enough to handle, insert chopstick in the thicker end, serving whole or cut ears in half. Spread with Chipotle-lime Butter (a pastry brush is good for this) and spread Cotija cheese in a tray; roll corn ears in cheese. Add salt if needed.
RIFFS:
Switch out butters. Try Chimichurri Butter, combining ½ a stick of softened butter, 1 tsp. each minced cilantro and flat Italian parsley, 4-5 minced garlic cloves, 2 tablespoons fresh oregano.
Grilled Elote is also delicious and looks impressive. For this, you’ll want to pull back the husk, remove the silks and put the husks back in place. Then, soak the corns in cold water for about 5 minutes before putting them on a grill over hot coals. The water will keep the husks from burning quickly (or catching fire!) and create a steam bath inside each corn for quick cooking. Cook the corn for about 5 minutes or until done (test the kernels, you want them to be tender but not mushy). You can serve these in their husks by peeling back half of the husks on each corn, and leaving the husks in place on the side that is touching the plate. Brush corns with butter of choice (see above). Or, you can remove the husks completely and return the corns to the grill just long enough so that they get grill marks before brushing them with butter. If you opt to return the corn to the grill, you’ll want to slightly undercook them in the step above, while they are still in their husks.
volcanes- grilled baby cactus paddles

Nopalitos topped with Refried Beans and Queso Oaxaca, photo my Adriana Almazan Lahl from Celebraciones Mexicanas: History, Traditions and Recipes ALL RIGHTS RESERVED
Black “Baked” Frijole de Olla (Mexican Clay Pot Beans) with Chorizo and Lardons
(serves 10-12)
Before you start
Prepare Frijoles de Olla (see B, prepare 24 hours in advance)
Prepare Chipotle BBQ Sauce (there are numerous recipes on-line)
Ingredients
3 cups Frijole de Olla (Mexican Clay Pot Beans) See Basic Recipes for Californio Cooking, beans should be cooked with 1 oz. dark (at least 70%) chocolate, which is listed as optional in the recipe for Frijoles de Olla. You can use black beans or pinto beans for this recipe.
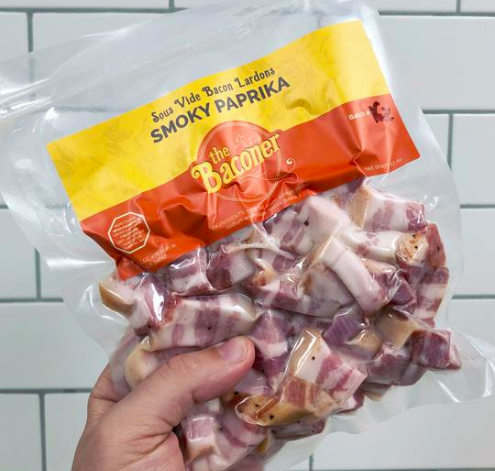
1 ½ lbs. bacon ends or pork lardons (I highly recommend The Baconer Pork Lardons, select either Smoky Paprika, Bourbon or Jalapeño, depending on which way you want to take the flavor profile of your beans)
1 ½ lbs. chorizo
1 medium carrot, cut into small dice
1 large Spanish white onion, medium dice
1 cup dark rum
2 cloves garlic, minced
2 cups veggie broth, plus more if needed
1 cup chipotle barbecue sauce
1/4 cup plus 2 tablespoons coarsely chopped fresh cilantro leaves, divided
1/4 cup clover honey
3 tablespoons molasses
1/2 piloncillo
1/2 teaspoon freshly ground pepper, or more taste
½ cup chopped cilantro
1/3 teaspoon Applewood or Hickory Smoked salt, or more to taste
Preheat oven to 325ºF.
Cook bacon ends or lardons until done (should have some crisper areas and some softer areas, just like it does when you make it normally). Discard fat and drain bacon on a paper towel. Remove chorizo from its skin by slitting lengthwise and cook in a pan with just a little bit of oil. Chorizo releases a lot of oil as it cooks. Save this oil and sauté carrots in it over a medium-high heat, stirring occasionally, until they just start to become soft, about, 3-4 minutes, then add onion and cook an additional 3 -4 minutes until they are translucent . Remove vegetables with slotted spoon to a plate lined with paper towels. Reduce heat to medium and deglaze pan with rum, bring to a simmer, add minced garlic and cook until reduced by half, about 5 minutes. Add this mixture to the beans using a large mixing bowl.
Add 2 cups stock, barbecue sauce, honey, molasses, piloncillo and the reserved chorizo, bacon or lardons and veggies to the beans. Mix gently to combine. Taste for sweetness and balance. Transfer the mixture to a large baking dish and cover. Bake at 300° for 30 minutes. After 30 minutes, check to see if the bean mixture is dry; if it is, add a little more stock. Bake for 30 minutes more. Uncover, add chopped cilantro to the beans and bake 15 minutes more to thicken slightly. Salt to taste and serve as a side dish, garnished with chopped onions and fresh cilantro.
B. Frijoles de Olla- Clay Pot Beans
(serves 10-12)
2 lb black beans (or substitute pinto or any beans you like, I highly recommend Rancho Gordo beans, there is a huge difference in the end result
6+ cups water
½ Spanish white onion
3 garlic cloves
1–2 sprigs of epazote (available at Mexican markets, has gas-inhibiting properties and adds flavor, also available dry from My Spice Sage . If using, put 2 oz in tea infuser)
Salt to taste
Clean beans, removing debris, rocks, or broken beans. Once cleaned, add beans to a clay pot full of water. (Note: You may, of course, make your beans in a traditional stainless steel pot. The flavor will be subtly but perceptibly different, though.) Be sure your pot is large enough to accommodate the beans as they expand. Your dry beans should not rise to past the 1/3 mark of your pot. Rinse beans and add water so that you have 1/3 beans and 2/3 water in your pot. Add onion, garlic, chile, bay leaf, and epazote; cook covered for 2 hours and add salt, then continue cooking for 1-6 hours, or up to 12 hours on medium-low heat, until tender (note: cooking time will vary depending on the size and condition of your beans; if not using Rancho Gordo beans, the beans you purchase may have spent a longer time on the grocery shelf and will take longer to cook and there is really no way to know.) Also, for larger quantities of beans, cooking may take significantly longer. Make sure beans are constantly covered with water. No need to stir, but it is important that the beans never lack water or are allowed to become dry. If needed, add hot, never cold, water to bean pot. As you add more water, you may need to add more salt. It is important not to under- salt the beans. Remove onion, garlic cloves, and epazote before serving.
MEXICAN FOODWAYS: RECIPES FOR CHILDREN'S DAY
On April 30th, celebrate el dia del niño

Mazahua Girls* in Traditional Dresses by Jorge Ontiveros from Celebraciones Mexicanas: History, Traditions and Recipes. ALL RIGHTS RESERVED.
In 1924, Mexican president Alvaro Obregon of Mexico declared April 30 Día del Niño, or Day of the Child, following the League of Nations’ Declaration of the Rights of the Child in the same year. Although it is not an official holiday on the school calendar, activities at school may include special presentations for the parents, with many schools celebrating the day before so that the children can have a day off.
Mexico celebrates many, many holidays that we don't even think about. It's core to a culture that loves to celebrate, but also one that values every member of the community in a way we once may have in this country, but have forgotten-- or maybe still lives here only in small communities. There is Grandparent's Day on August 28th, Dia del Albanil on May 3rd, which celebrates housebuilders and bricklayers so important because they create the houses that Mexicans will call "home" when completed, and Teacher's Day on May 15th.
*According to the 2010 Mexican census, 116,240 speakers of the Mazahua language reside in the State of Mexico. (Mexican census identifies and counts indigenous people based on the language spoken), and account for 53% of all indigenous speakers in the state. Smaller population groups also inhabit the Mexican states of Michoacan and Queretaro. Their folk religious practices combine elements of Catholicism and traditional, pre-conquest beliefs, including continuing the practice of New Fire Day on March 19.
Some favorite treats that are loved by Mexican children are:
Albondingas
Mexican meatballs with the surprise treat of a hardboiled egg in the middle.

Albondigas Photo by Adriana Almazan Lahl from Celebraciones Mexicanas: History, Traditions and Recipes. ALL RIGHTS RESERVED
Albondigas Recipe
(serves 6 )
2 lbs ground beef or 1 lb. each ground beef and ground pork
4 sprigs fresh finely minced epazote or ½ teaspoon dried epazote
2 garlic cloves, minced, plus 1 whole garlic clove
1 raw egg
½ cup breadcrumbs or cooked rice
½ white onion finely chopped
Salt and pepper to taste
1-14 oz. can chopped, stewed tomatoes
½ Spanish white onion, chopped
3 chipotle chiles in adobo sauce, canned (optional)
2 tbsp canola or vegetable oil
2 cups chicken or beef stock
1 bay leaf
1 teaspoon Mexican oregano
3 cilantro sprigs
2 hard-boiled eggs
2-3 tbsp olive oil
In a bowl, mix ground meat, epazote, minced garlic, lightly beaten raw egg, breadcrumbs or rice, finely chopped onion, salt, and pepper; mix well and cover with plastic wrap. Place in the refrigerator for a half hour.
Meanwhile, mix tomatoes, ½ onion, garlic clove, and chipotle in blender until smooth. Heat oil in a saucepan; add blended sauce; and let it cook covered for 5–7 minutes over high heat. Add stock and herbs, bring to a slow boil, reduce heat and allow to simmer for 30-45 minutes, covered, until ready to use.
Peel and quarter boiled eggs. Make meatballs 1-inch in diameter using the ground meat mixture. Make a hole with your thumb in the middle of each meatball and place a piece of hard-boiled egg in the cavity. Seal very carefully with a little more ground meat and roll until smooth.
Sear meatballs in a sauté pan with the olive oil on a medium fire, turning so all sides are quickly browned. Bring tomato-chipotle stock back to a boil. Now, add meatballs into the stock and let them cook for 20-25 minutes on medium heat (cook on the longer side if you have used ground pork in your meatballs; add additional stock if needed. Serve hot meatballs with broth, top with chopped cilantro and avocado slices and beans on the side.
RIFFS: Try a roasted tomatillo-chile broth by replacing the canned tomatoes with a pound of tomatillos. You’ll want to remove the husks, wash the tomatillos and dry roast them on the comal until they blister, turning as they do so as to blister all sides and as the meat of the tomatillo begins to turn color. Replace chipotles with either jalapeño or Serrano chiles to taste (Serranos are much hotter, the jalapeños widely available in the markets in the US today are often surprisingly mild, you may want to use some of each to achieve the level of spice you are looking for). Your chiles should also be roasted on the comal before putting all ingredients in the blender (step 2, above).
Gelatina-
if you’ve travel to Mexico, or live in the city with a large Mexican population, you’ve probably seen them in pushcarts: pretty little gelatin desserts with raisins, nuts, or food feelings usually layered. Gelatin dessert is eaten almost daily and 90% of Mexican homes. Mexicans consume more gelatin desserts than nearly any other country in the world. Whether it’s a birthday party, baptism, or Dia del Niño, the desert selection usually includes a beautifully crafted gelatin. In restaurants, the dessert tray will almost always include a variety of gelatin desserts”(according to Mexico Cooks). Whether its a birthday party, baptism or “quinze”(quinzenera– a celebration much like our “Sweet Sixteen” parties, these large family gatherings are practically de rigor in Mexico) the dessert is usually a beautifully crafted gelatin.

Gelatinas Mexicanas at a Mexican street food stand photo by Yo No Lo Tengo
In fact, Mexico has elevated gelatin desserts to an art form. Gelatin artists (yes, there are many Señoras who are famous for their Gelatina Artistica in Mexico, they even give classes and are quite competitive about who is the reina de la Gelatina) take these healthier cake alternatives to a whole other level. Using a a fine flavor injection tool, 3-dimensional creations are set in a transparent gelatin base, all 100% edible including the intricate flowers. El Arte Floral en Gelatina is originally from France. Check for Gelatina Artistica where you live. In San Francisco, Sweets Collection creates these amazing, edible works of art, sure to delight children (or your inner child!).

Photo by Sweets Collections
Paletas-
fruit popsicles made famous in the U.S by Fany Gerson, who sells them in her sweets shop in New York City, and shares recipes in her cookbook of the same name.
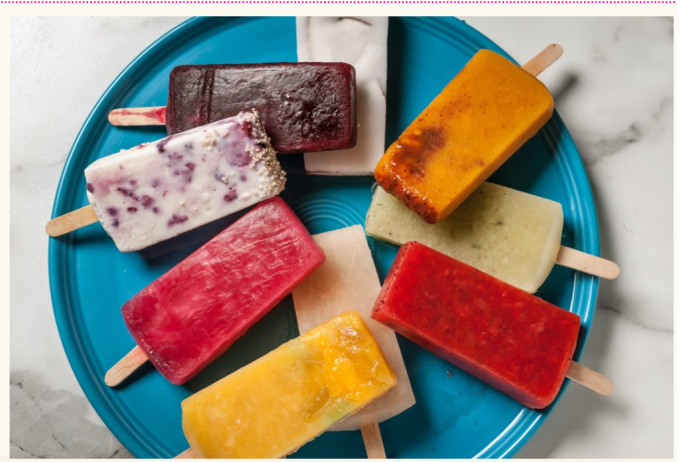
Paletas photo with the permission of Fany Gerson from the website of La Newyorkina
Alegrias: Happy Amaranth Cakes-
think of these like Rice Krispy treats, but healthier (amaranth is one a group of grains that has been labeled as a "superfood" for its multitude of health benefits)

Happy Amaranth Cakes. Photo and recipe (below) by Adriana Almazan Lahl from Celebraciones Mexicanas: History, Traditions and Recipes. ALL RIGHTS RESERVED.
Happy Amaranth Cakes / AlegrÍas
(MAKES 20 PIECES)
2 cups sugar
½ cup honey 2 cups water
2 cups water
1 lb toasted amaranth
4 large ring molds, or baking pan
½ cup mix of raisins and almonds or peanuts (optional)
In a large pot add sugar, honey, and water and stir until the mix becomes a syrup and has reached the hard-ball stage, 245º on a candy thermometer. Remove from heat and add amaranth, raisins, and nuts (if desired). Mix well with a wooden spoon until you get a paste-like consistency. Place mix inside ring molds and press them down to form tight patties. Remove mold and cut patties in four pieces. Allow to cool completely and wrap cakes with plastic wrap.
You can also spread the mixture on a large baking sheet or wooden board. Press it to a uniform thickness of a ½ inch, using a rolling pin. Cool the mixture for about 2 minutes, until partially set, then cut it into finger-size strips or squares.
Wrap the pieces individually in plastic wrap and store in a tin for up to 1 month.
mexican foodways: Tamales & candelmas
February 2nd is also Groundhog Day, which owes its origin to Candlemas. There is an old European supposition that a sunny Candlemas day would lead the winter to last for ‘another six weeks’
With their penchant for making a party out of every occasion, Mexicans will finally wrap up the long Christmas holiday period (which began December 16 with Las Posadas and continued through January 6th with Dia de Los Reyes or Day of the Wise Men) this coming week with Dia de la Candelaria (Candlemas), celebrated on February 2nd.
Candlemas, so called because this was the day that all the Church’s candles for the year were blessed, stems from Paganism; in pre-Christian times, it was the festival of light. This ancient festival marked the midpoint of winter, halfway between the winter solstice (shortest day) and the spring equinox.
Tamales with Squash Blossom, photo by Adriana Almazan Lahl from Celebraciones Mexicanas: History, Traditions and Recipes ALL RIGHTS RESERVED
“La Dia de La Candelaria commemorates the ritual purification of Mary, 40 days after the birth of her son Jesus in accordance with Jewish law. Ritual purification stems back to a Jewish tradition that women were considered unclean after the birth of a child. For 40 days for a boy, and 60 days for a girl, women weren’t allowed to worship in the temple. At the end of this time, women were brought to the Temple or Synagogue to be purified” (Celebraciones Mexicanas: History, Traditions and Recipes, p. 119). This day also marks the ritual presentation of the baby Jesus to God in the Temple at Jerusalem. While it is unclear why these two holidays fall on the same day, the Gospel of Luke says that Jesus Simeon held the baby Jesus and called him a Light to the World.
(On a side note, February 2nd is also Groundhog Day, which owes its origin to Candlemas. There is an old European supposition that a sunny Candlemas day would lead the winter to last for ‘another six weeks’ from 123Holiday.net).
Dia de La Candelaria in Mexico
It all begins with the tradition of the Rosca de Reyes a ring-shaped cake shared on Dia de Los Reyes, which provides a clever way to extend the Christmas holiday celebrations for another few weeks. As with all Mexican holidays, it’s a family affair: On January 6th neighbors and family usually share the light evening meal, each having a chance to find the figure of Baby Jesus in their slice of the Rosca. The lucky guest who finds Him is designated to provide tamales and Mexican Hot Chocolate (recipe) Dia de La Candelaria, February 2nd.
Tamales: Communal cooking in Mexico
The name” tamale” or more correctly tamal — comes from the Nahuatl word tamalli — and is masa steamed or boiled in a leaf wrapper, which is discarded before eating. Tamales are made very much the same way today as they were by Aztec and Mayan women as far back as 8000 to 5000 BCE, with some minor modifications; and are an essential part of many Mexican festivals. Initially disdained by the invading Spaniards in the 16th century Mexico as food of the lower class, described here by Jeffrey M. Pitcher in his book Que vivan los tamales!: Food and the making of Mexican culture; this portable culinary wonder eventually won over the Europeans;
“part of the ongoing effort . . . to Europeanize Mexico was an attempt to replace corn with wheat [which was introduced to Mexico by the Europeans of the Spanish Conquest]. But [corn], native foods and flavors persisted and became an essential part of . . . what it means to be authentically Mexican”
Tamale-making is a ritual that has been part of Mexican life since pre-Hispanic times, when special fillings and forms were designated for each specific festival or life event. Today, tamales are typically filled with meats, cheese or vegetables, especially chilis. Preparation is complex, time-consuming and an excellent example of Mexican communal cooking, where this task usually falls to the women. Rather than being seen as demeaning, this opportunity for Mexican women to gather and work together gives them respect and power in their communities. Here, an abuelita(meaning “grandmother” but also a term used to refer to the oldest generation of women in the village) describes how the women gather to carry on a tradition that has been passed through the generations, making tamales de elote corn tamales):
“Three pair of hands, work together, seamlessly . . . in a process [that] includes husking the corn, cutting it off the cob, grinding the kernels in the molino [mill] with pieces of cinnamon, breaking fifteen eggs and separating out the yolks, opening cans of sweetened condensed milk . . . [and beating] all the ingredients together in the masa for a long time…. Next, we fill the husks with the masa [dough and]…sprinkle raisins on top. Finally we fold the husks to enclose the dough.” (Maria Elisa Christie in Kitchenspace: Women, Fiestas, and Everyday Life in Central Mexico)
RECIPES FROM THE MISSION
winter
rosca de reyes: bake a "3 Kings' Cake" for January 6th

Photo by Adriana Almazan Lahl from Celebraciones Mexicanas: History, Traditions and Recipes, ALL RIGHTS RESERVED
(Note: the following is excerpted from my book, Celebraciones Mexicanas: History, Traditions and Recipes and the recipe below is by co-author Adriana Almazan Lahl)
The charming Mexican tradition of the Rosca de Reyes extends the Christmas celebrations for another few weeks; the lucky guest who finds the Baby Jesus figure hidden in the cake is designated to host a tamalda, a party at which tamales and Mexican hot chocolate are served, on February 2, Día del Candelaria.
January 6th is the day Mexican children wait for all year long, as they anticipate the arrival of Los Reyes Magos (rather than Santa Claus on Christmas Eve). It is the Three Wise Men who will bring them toys, just as they came to ancient Bethlehem bearing gifts for the baby Jesus. (In Mexico, for Christmas, it is more traditional for children to receive clothing). In many areas of Mexico, children leave out their empty shoes on the night of January 5, hoping that they will find them filled with treasures in the morning.
The holiday is also celebrated with the charming tradition of the Rosca de Reyes. This is “the Kings’ Cake,” a flour-based cake rich with butter and egg yolks, originally in the shape of a ring to echo a crown, but which has grown into an oval as it has “stretched” to accommodate larger crowds. As wheat flour was not introduced to Mexico until the invasion of the Spanish in the 16th century, the Rosca likely became part of Mexico’s holiday traditions sometime after that (originally, it was the Moors, invading Spain in the eighth century, who brought with them cakes rich in almonds, dried fruits, spices, and refined sugar—all key ingredients in the rosca).
Hidden inside the rosca is a figure of baby Jesus, either plastic or porcelain, to symbolize how Mary and Joseph had to hide Him from King Herod, who had been apprised of the signs that a new and rightful king of Jerusalem would be born and ordered all male infants in Bethlehem be put to death. The deadly search is symbolized by the knife cutting the ring cake. As with many Mexican holidays, on January 6 neighbors and family share the light evening meal, each having a chance to find the figure of baby Jesus in their slice of the rosca.
Three King’s Bread Ring / Rosca de Reyes Tradicional
(serves 8-10 )
3½ oz sugar
¼ cup orange blossom water
1 envelope (1 tsp) yeast
¼ cup warm water
2 cups flour
½ tsp salt
1 oz powdered milk
4 eggs
Rind of half a lemon
Rind of half an orange
3½ oz butter
½ tspn. anise seed
4 tsp vanilla extract
Small baby figurine or toy, porcelain or ceramic (or several)
Concha Bread Mix (for decoration, see below)
¼ cup candied figs cut in strips
¼ cup candied oranges rind cut in strips
¼ cup candied pineapple strips
¼ cup candied cherries cut in half
1 egg, beaten, to varnish Rosca
COMBINE water, 1 tbsp of sugar, and orange blossom water and warm to 105°. Dissolve yeast in warm water and let it sit for 5 minutes or until it starts foam- ing. Place the flour and form a mountain with a valley in the middle or “volcano.” Place half the sugar, salt, powdered milk, and cracked eggs inside the “valley.” Using this area as your work bowl, premix the ingredients carefully with your hands. Once ingredients are well mixed in the center, add water with yeast and start incorporating the flour dry ingredients and eggs from the area around until all ingredients are well mixed and become a pliable, elastic, and smooth dough. Add the lemon and orange rind, the remaining sugar, dry milk, and salt and the butter and work the dough until all ingredients are well incorporated again. Place in an 18 x 14 pre-greased pan and cover with pre-greased plastic wrap (spray the wrap with spray shortening to grease it before placing it over dough). Wait two hours until the dough doubles in size, and punch once to deflate it. Cover again and wait an additional 25 minutes, punch again, and shape into a 10- to 14-inch oval wreath. Lift wreath carefully and place on a pre-greased baking sheet. Insert small figurine(s) into the wreath. Cover and let it rise again to double the original size. Place concha dough strips across the wreath, and sprinkle concha dough only with sugar, alternating concha dough with can- died fruit strips (cherries, orange, figs, and pineapple). Varnish whole wreath with beaten egg and place in a preheated oven at 350° for 30 minutes until bread turns golden brown.
Warning: Be aware of small figurines in wreath. Supervise children while cutting and eating this bread.
Concha Bread Mix
3½ oz powdered sugar
3½ oz margarine
3½ oz flour
CREAM margarine with powdered sugar. Once well mixed, add flour slowly, until incorporated completely.
Mexican Holiday Punch “Ponche Navideño”: recipes and the story of a contraband fruit
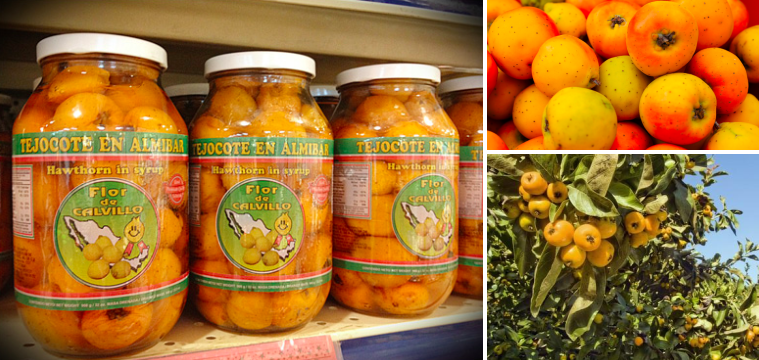
Some ingredients used to make ponche are more seasonal and even exotic. Depending upon where you live, you may be able to locate fresh tejocotes, known to the Aztecs as Texocotli (stone fruit). The fruit of the hawthorn tree, these resemble crab apples, have a sweet-sour flavor and an orange to golden yellow color. Although abundant in the Mexican highlands, tejocote could not be imported to this country because of its potential to harbor exotic insects. Mexicans are all about authentic ingredients for their special family recipes, so devotees had to resort to illegal enterprise to obtain the tejocotes. In 2009, the LA Times reported that “Nationwide, tejocote was the fruit most seized by the U.S. Department of Agriculture’s Smuggling, Interdiction and Trade Compliance program from 2002 to 2006.”
Demand and seizures gave birth to a lucrative new industry, the report continued, [after] “a market vendor named Doña Maria [ a USDA smuggling control officer] how to obtain legal supplies, and he suggested that farmers grow tejocotes domestically”. And so, a successful exotic fruit farmer in Pauma Valley, San Diego County’s Valley Center added tejocotes to his crop. In 1999, Jaime Serrato, who was familiar with tejocotes from his childhood in Michoacán, started grafting trees from bud wood in his orchard and today has 35 acres of trees. Today, tejocotes can be widely found jarred or canned, and fresh during the holidays in regional Latino markets.
Mexican Christmas Fruit Punch/Ponche de Navidad
(Serves 12-15)
1 gallon boiling water

Photo credit: Historically Speaking News
15 tejocotes, cut in half
2 small pears, cut bite-sized
1 cup raisins
1 cup prunes
8 tamarind pods, peeled and seeded, or 6 tablespoons tamarind paste
3½ oz. dry hibiscus
6 pieces sugar cane, cut in quarters lengthwise (available in Latino markets including Casa Lucas)
one cone piloncillo or dark brown sugar (optional, for a sweeter ponche)
4 small yellow apples, chopped bite-sized
6 guavas, peeled and cut into bite-sized pieces
6 cinnamon sticks
2 whole cloves
1 star anise
2 oranges, sliced and cut in half
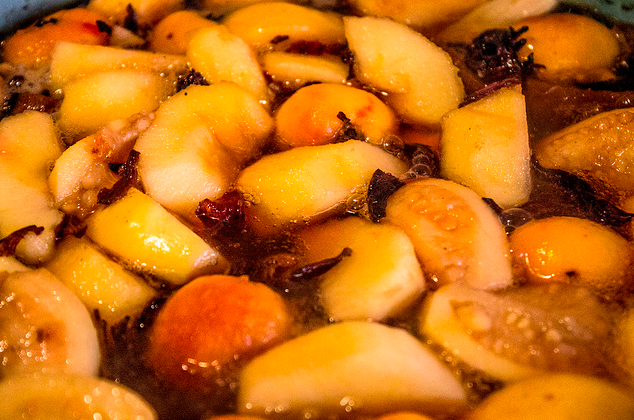
Wash all fruits and cut as required. In a large pot, boil water and add tamarind, hibiscus, star anise, cloves, piloncilli (if using) and cinnamon sticks. Boil on high for 10-15 minutes (if using piloncillo, boil until it is almost completely dissoolved), strain mixture to remove any remain of flowers, spices or tamarind. Once strained, add all cut fruits, cook 5 minutes and add dry fruits, and sugar cane. Cook for additional 20 minutes. Serve in a mug or a clay cup, garnished with a sugar cane stick intended to be used as a spoon, and for eating the fruits.
Serve warm. Decorate with a half a slice of orange. Optional: add a splash of rum, cane spirit (aguardiente), brandy or event tequila!
The consistency can be controlled by the amount of water you use and cooking time. Less water+longer cooking time= somewhat thicker ponche. If you prefer a thinner beverage, add more water. When reheating ponche, you may want to thin with a little water. Keep refrigerated in an air-tight container, will last for at least a week. I like to boil down my leftover ponche until it forms a syrup and serve (with fruit and all) cold spooned over Greek yogurt!
Atole: History and a Chocolate Atole (Champurrado) Recipe
Corn is one of the "Three Sisters" of Mexico, three ingredients that have mainstays of the Mexican diet since pre-Columbian times (the other two 'sisters" are squash and beans). In Mexico, they even say, "Sin maiz, no hay pais" or "Without corn, there is no country". Corn tortillas are on the table at every meal, and the average Mexican consumes half a kilo, or just over a pound per day and up to a kilo per day in rural areas. So it is no surprise that a corn-based beverage is one of the most popular, typically served with a Torta de Tamale (a tamale on a Mexican bread roll) for desayuno. Atole is also traditional on Dia de Los Muertos, Day of the Virgin of Guadalupe (December 12th) and comes in many flavors: with fruit, nuts, and the most popular is with chocolate, called champurrado. This thick, creamy and comforting beverage has event attracted the attention of the likes of David Lebowitz, who describes it as having "a consistency similar to crème anglaise"
As early as 1651, the process by which atole was made was noted by botanist Francisco Hernandez in a report on the use of plants in Nueva España. :
Atolli was eight parts water and six parts maize, plus lime, cooked until soft. The maize was then ground and cooked again until it thickened
.
The following description of Mexican atoles by Englishwoman Fanny Chambers Gooch, written in 1887, gives us some interesting insight into the varieties of the time:

mage from page 26 of "Cocoa and chocolate, a short history of their production and use" (1907)
‘I found plain atole much the same in appearance as gruel of Indian meal, but much better in taste, having the slight flavor of the lime in which the corn is soaked, and the advantage of being ground on the metate, which preserves a substance lost in grinding in a mill. . . . Atole de leche, (milk), by adding chocolate takes the name of champurrado if the bark of cacao is added, it becomes atole de cascara; if red chile—- chile atole. If, instead, any of these agua miel, sweet water of the maguey, is added, it is called atole de agua miel; if piloncillo, the native brown sugar, again the name is modified to atole de pinolei’
There is evidence of mixing atole with chocolate as far back as the Mayan era. In the Yucatan today, where the strongest Mayan influences remain, they serve a thick, chocolate-flavored atolecalled tanchcua, to which allspice, honey ad black pepper is added. Although the following recipe uses milk, it is common in Mexico to skip the milk and make champurrado with water. Experiment… there are so many ways to make this!
Champurrado
(makes 6 small cups)

Piloncillo and Chocolate in the market in Oaxaca, MX. Photo by Waywuwei.
1 cup prepared tortilla masa (Maseca brand or equivalent) or fresh tortilla
masa (not tamale masa)
1 cup milk
5 cups water
1 cinnamon stick
1 Mexican chocolate (available in Latino markets, brand names Ibarro or Abuelita,
Rancho Gordo stocks a wonderful hand-crafted stoneground Mexican Chocolate)
1 ½ piloncillo, grated (see photo, right, or 6 oz. sugar)
1 cup milk
Blend masa with a cup of water by hand or with a blender;, be sure there are no lumps. Add a second cup of water gradually, continue blending. Heat the remaining water in another saucepan. Once your water is boiling, lower to medium heat and add cinnamon, chocolate, and sugar or piloncillo, cooking until the chocolate is dissolved and starts to just begins boil. Now, add masa mixture and stir constantly to avoid lumps and to keep from sticking to the bottom of pan. Lower heat to medium and continue stirring until masa is cooked (30 minutes), Then add milk and stir for 5 more minutes.
5 Mexican beverages to KEEP YOU WARM that you can make right now!
Those of you who follow me know that I am usually a stickler for authenticity, especially when it comes to the subject of Mexican cuisine and customs. But, baby, it’s cold outside and that means everyone needs a quick fix of something hot and Mexican (unless you already have this in your life, in which case you don’t have to worry so much about the cold. But for the rest of you….), so we are going to cut some corners.
If you have:

1. Mexican Coffee or Cafe de Olla con Canela
A clay pot* (optional)
4½ oz piloncillo, roughly chopped or brown sugar
(or omit for those who take their coffee without sweetner)
Zest of half orange, finely chopped
2 whole cloves
3-inch piece of cinnamon stick
¾ cup freshly ground dark-roasted Mexican coffee
… then you can make
1. Mexican Coffee or Cafe de Olla CON CANELA
(Makes 2 cups)
*The clay pot used for this recipe adds a subtle put perceptible flavor to the coffee. Do not use the same clay pot you use to prepare beans—you need a separate pot.
In a clay pot (olla) or a kettle bring 9 cups of water to boil, combine the ingredients, stirring until the piloncillo or brown sugar is dissolved. Let steep at least 10 minutes. Pour through a strainer before serving. For special occasions, it is traditional to add a splash of rum or brandy to the individual coffee cups.
If you have...
*an envelope of “Horchata”
OR
1 cup of white rice
1 cup milk
2 sticks of cinnamon
8 cups water
1 tsp vanilla extract
¾ cup sugar or to taste
Ground cinnamon to taste

2. Horchata Latte, photo by Carolyn Coles
… then you can make
2. Horchata Latte
*(Makes 8 -10 cups of horchata)
Note, if you leave near a Mexican market, like Casa Lucas on 24th St. in the Mission district in San Francisco, you can buy envelopes of “Instant Horchata Drink Mix” (not my favorite by a long shot because it typically is way too sweet and contains at least come artificial ingredients) to which you just add water. It’s not the real deal, but it is certainly much quicker. If not, recipe for making Horchata follows
Wash rice and then soak it in 1 cup of milk with cinnamon sticks in a covered container; refrigerate overnight. In a blender, add rice, milk, and cinnamon sticks with some of the water; mix until completely blended. Strain though a coffee filter or a fine cheese cloth.In a large pitcher, add the strained mixture, vanilla, sugar to taste, and the rest of the cold water. Stir well and reserve.
Prepare coffee for lattes as usual. Substitute Horchata (rice milk) for regular milk. No need to add sugar, your Horchata Latte is already sweet. Serve with a dash of ground cinnamon

3. Quick Mexican Hot Chocolate, photo by Adriana Almazan Lahl from Celebraciones Mexicanas. ALL RIGHTS RESERVED.
2-3 teaspoons sugar, preferably brown, to taste
1/2 teaspoon vanilla (optional), we recommend MySpaceSage Pure Vanilla Extract
1-2 sticks cinnamon (if you happen to have Mexican chocolate disks: the best are from Rancho Gordo, you don’t need this)
3 oz or 6 tablespoons chocolate (in any form)
2 1/2 cups milk or, water and 1/4 cup cream or half & half
... then you can make
3. Quick Mexican Hot Chocolate
(Makes enough for 2 large mugs)
Bring 2 1/2 cups of milk or water (yes, in Mexico, they sometimes make hot chocolate with water) with a teaspoon of vanilla (optional) to boil and reduce heat, adding 1 stick of cinnamon only if you do not have Mexican Chocolate disks (like Abuelita or Ibarra). Allow to simmer (on low) for ten minutes. If using milk, you’ll want to stir occasionally as you are warming the milk mixture, being careful not to allow the pot to boil (or boil over!) Next, add your chocolate. This part is important: if you are adding any kind of sweetened chocolate, including Mexican Chocolate disks, do not add sugar (see next step). If using unsweetened baker’s chocolate square, add 2-3 teaspoons, to taste, of brown sugar (or cane sugar if you don’t have brown sugar) to the hot milk or water and continue cooking until chocolate is completely melted. If using any kind of sweetened bar chocolate, or even sweetened chocolate chips, follow this same step but do not add sugar. If using unsweetened cocoa powder, heat 2 tablespoons of water, sugar and the cocoa powder and microwave briefly and stir to form a paste, which you will add to the hot milk or water. If using sweetened cocoa powder, follow this same step but do not add sugar. Remove warmed milk-chocolate mixture from the stove. Whisk until the hot chocolate turns frothy. Pour into individual clay mugs. Garnish with a stick of cinnamon.
If you have...
4. Champurrado (Chocolate Atole). Señora Soledad demonstrates a traditional method for making Champurrado, photo by Ryan Pikkel
1/2 cup prepared tortilla masa (Maseca brand or equivalent) or fresh tortilla
masa (not tamale masa)
scant pinch of salt
4 cups water and a cup of Mexican Hot Chocolate (see above)
or
5 cups water and any kind of chocolate
1/2- 1 cup milk
...then you can make
4. Quick Champurrado (Chocolate Atole)
(Makes enough for 4 large mugs)
Blend masa with a cup of water by hand or with a hand mixer; be sure there are no lumps left after mixing. Add a second cup of water gradually, continue blending. In a large pot, heat 2 cups water, salt and 1 cup of Mexican Hot Chocolate, bring to a gentle boil; or, add whatever chocolate you are using (see italicized section above in the instructions for Mexican Hot Chocolate) to 3 cups water to which salt has been added and bring to a boil. Add masa mixture. Lower heat to medium and continue stirring until masa is cooked (5 minutes), then add more water if needed (in case mixture is too thick, you want to achieve a consistency similar to a thinnish gravy, although some prefer a thicker atole) and stir for 5 more minutes. Finish by adding 1 cup of milk.Taste for sweetness, add more sugar if needed. (You may want to use an electric whisk to finish off your atole, it adds a lovely foam and will get out any lumps of masa that might remain.)
If you have...

5. Quick Mexican Holiday Punch - Ponche with Sugar Cane, photo by Protoplasma K.
2 cups apple cider
an apple, cut bite-sized
a pear, cut bite-sized
1/4 cup raisins
1/2 cup other dried fruit such as prunes, cherries
1/4-1/3 cup dried cranberries (important for tartness)
3 tablespoons brown sugar
1 cinnamon stick
2 whole cloves (optional)
1 star anise (optional)
2 oranges, sliced and cut in half
Sugar cane (optional)
... then you can make
5. Quick "PONCHE"- Mexican Holiday Punch
(Makes enough for 2 large mugs)
Wash all fruits and cut as required. In a large pot, boil apple cider to which add star anise, cloves, brown sugar and cinnamon sticks have been added. Boil on high for 10-15 minutes, strain mixture to remove any remaining spices. Once strained, add all cut fruits, cook 5 minutes and add dry fruits, and sugar cane. Cook for additional 20 minutes. Serve in a mug or a clay cup. Garnish with sugar cane (optional). Add brandy for extra warmth!
traditional recipes
Traditional recipes for Mexican Hot Chocolate, Champurrado, Ponche and Cafe de Olla can be found in my book, Celebraciones Mexicanas: History, Traditions and Recipes.
summer
Esquites Shooters and Warm Corn Soup two ways
A Word About Fresh Corn
According to the National Gardening Association, “you can pull back a bit of the husk and check to see if the ear looks well filled and the kernels are creamy yellow or white. Many gardening guides tell you to pierce a kernel with your thumbnail to test for ripeness. If the liquid inside is watery, that ear isn’t quite ready. If the liquid is white or ‘milky,’ you’re in business.”
It’s especially important to buy corn from a farmer’s market or a retailer you know gets fresh produce deliveries direct from the farm early every morning, Why? Corn tastes different and is different after 24 hours,“the natural conversion of sugar into starch is sped up when you harvest [the corn]. The moment you pick an ear of sweet corn, its sugars start to change into starches because the natural goal is to nourish seed for reproduction. In 24 hours, most varieties convert more than half their sugar content to starch”.

Preparing Esquites
(make 6-8 servings of soup or 36 shooters)
INGREDIENTS
10 very fresh ears of corn
1 1/2 tbsp salt
8-12 cups water
2 epazote sprig or 1 tsp dry epazote (optional)
2-4 cups Corn Stock (see recipe, below)
12 tablespoons crumbled Cotija cheese
Piquin or Ancho chile powder, or Rancho Gordo's Stardust Dipping Powder
Dollop of mayonnaise per serving (optional)
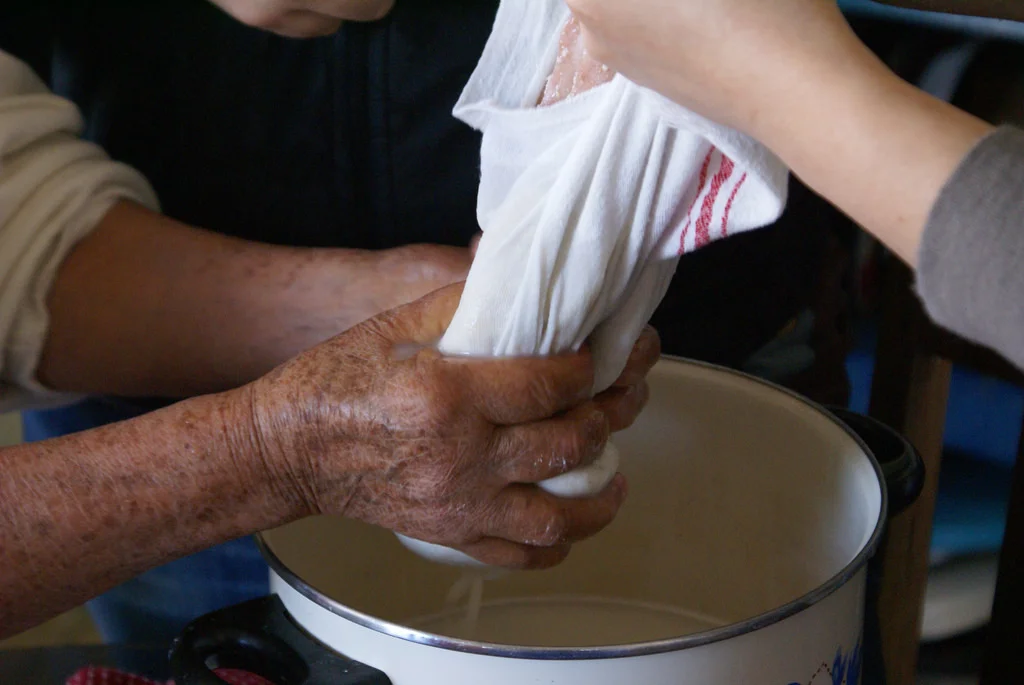
Using a very sharp a knife, remove corn kernels from cob by sitting the base of the corn on a wooden cutting board (plastic boards are too slippery) and slicing close to the cob with a downwards motion, using a serrated knife. Put corn kernels, corn cobs and epazote into rapidly boiling, salted water in a large pot for 3 minutes. Do not overcook corn. Shock corn by placing briefly in a large bowl of ice water so as to stop it from cooking further. Remove corn cobs and strain liquid and save both to make stock.
Traditional Esquites or Warm Corn Soup
Add corn kernels to simmering Corn Stock (see recipe below) and cook for just for 1-2 minutes, just to reheat them. Your ratio should be 2/3rd stock and 1/3 kernels, or, for a more stew-like dish, you can reverse the ratio so there is more corn than stock, which is how traditional Esquites are served in Mexico. There, they sprinkle the Esquites with piquín chile or ancho chile powder, the juice of half a lime, and 1 tablespoon of crumbled Cotija cheese, and some even add a dollop of mayonnaise.
Creamy Corn Soup
ADDITIONAL INGREDIENTS FOR CREAMY CORN SOUP
2 cups milk or cream or coconut milk (you can use low-fat milk, whole milk, half-and-half or heavy cream or any combination thereof to achieve the richness and creaminess you want)
cilantro for garnish
red or green chili oil for garnish
Purée 3/4 of the corn kernels with 3 cups of the Corn Broth and the milk, half-and-half or heavy cream, until you have a smooth soup. You may need to work this soup in batches and blend longer than usual, as corn is fibrous. Add more corn stock or milk to thin the soup as needed. Taste and add salt as needed. To serve, reheat soup and remaining corn kernels, separately. Ladle soup into bowls, add a heaping tablespoon of the remaining corn kernels in the middle and garnish with chopped cilantro and red chile oil.
RIFFS: Add 6-8 oz. cooked crabmeat (quality canned, fresh, previously frozen crabmeat is fine, you’ll want to reserve some for garnish) to mixture, and all of the corn kernels you prepared, to the blender and purée for a Creamy Corn and Crab Soup. Add a dollop of crabmeat to middle of soup (see below) a little chopped cilantro and chile oil for garnish.
Esquite Shooters
ADDITIONAL INGREDIENTS FOR ESQUITE SHOOTERS
1 serrano chile or jalapeño (according to your taste), deveined, seeded, and minced
1 sweet red pepper, small dice
6 tablespoons melted butter
Salt and pepper (optional) to taste
Add butter, chiles and sweet peppers to cooked kernels and mix well. Add salt, and pepper (if using), to taste. Chill for at least an hour. Serve cold in double shot glasses, topped with Cotija cheese.
RIFFS: If you want to make Creamy Esquite Shooters, follow instruction for Creamy Corn Soup, above, ladling the soup into double shot glasses and topping with kernels. Creamy Esquite Shooters can be served hot or cold. If serving cold, top with Cotija cheese crumbles; if serving hot, garnish with red chile oil and chopped cilantro.
For Corn and Scallop Shooters, add well-seasoned broiled, sautéed or marinated (as in ceviche) bay scallops (if available, these are sweeter and you can leave them whole as they are smaller) or, sea scallops chopped to about the same size as your corn kernels. Ratio should be 2/3 corn to 1/3 scallops. Do not top with Cotija cheese, just a little chopped cilantro will do, for color. Serve hot if using sautéed or broiled scallops. Serve cold if you have prepared your scallops as ceviche, in an acidic (lemon or lime) marinade.
Corn Stock
2 tablespoon salted butter
1 poblano, dry-roasted to remove skin
1 Spanish white onion, chopped
3 tablespoons butter
10 corn cobs (the ones you left over from making the Esquites, which will still have plenty of flavor left in them as you only boiled them for 3 minutes)
4 cups water (if you have liquid left from boiling your corn, use it now)
1 clove garlic
Salt to taste
Sautée poblanos and onion in butter. Put corn cobs and garlic in a large pot adding water, or a combination of water and liquid from boiling your corn kerns, to cover and salt well. (You may need to cut your cobs in half so as to fit them in the pot). Bring to boil and lower to a simmer. Add onions and poblanos. Simmer for at least half an hour; the longer you simmer, the more corn flavor your stock will have. Check for salt and add as needed. Keep pot covered if you choose to continue cooking past 30 minutes, so your stock does not evaporate. Remove cobs and strain stock before using. Keep in the refrigerator for up to a week, freeze for up to 3 months.